Mastodon

We're looking for the trash fence...

V-Drives Rattle By Design

Posted on Thu 31 January 2013 in Systems - Engine

[]({static}/images/2013/01/WalterVDriveManual-1024x545.png)

Just wanted to make sure this got into the world.

Walter Gear V-Drive, they make noise when running at idle. Walter Gear says this is normal right in the manual.

Walter VDrive Manual


When Engines Fly: The Movie

Posted on Tue 18 October 2011 in Systems - Engine

I edited the video from pulling the engine, the picture is a bit cloudy because the Go Pro fogged up in its waterproof case. (still learning how to use it) Its not that fascinating to watch, but its here just the same, so watch it you will! Winking smile

Updated 2022: We no longer post to YouTube


And here is the timing issue…

Posted on Mon 26 September 2011 in Systems - Electrical

I figured out why the ACR didn’t flip to combined in time… right out of the documentation:

Blue Sea Systems CL-Series BatteryLink ACR PN7600 Owner’s Manuual

Internal time delay prevents relay action for transient conditions, voltage must be within range for approximately one minute to cause closure, relay will open when overvoltage is detected for approximately 15 seconds.

The regulator definitely went from an acceptable charging voltage to an overvoltage situation in less than a minute.


Overcharging Problems

Posted on Mon 26 September 2011 in Systems - Electrical

WiringDiagramExplanation

(CLICK GRAPHIC TO ENLARGE)

Not sure most of you will want to read this, but to my fellow boaters here goes…

When we had the engine out of the boat to replace the fuel tank we also decided to upgrade our alternator from a 65Amp model to a 100Amp model and to add a Balmar MC614 three-stage external regulator to increase our engine based charging capacity. We also made changes to our battery configuration. We combined all of our existing batteries into one 660Amp Hour (Ah) bank instead of two banks of 440Ah and 220Ah. We also added a single dedicated 12V starting battery.

Our starter is wired to the dedicated starting battery and the alternator charges this battery first. When there is charge being supplied to this battery our Blue Sea 7600 Automatic Charge Relay (ACR) combines the house and starting batteries so the alternator now charges all the batteries. In order for the Balmar external regulator to control the alternator output properly it monitors the voltage of the batteries it is charging (see 1 above). The problem we experienced was our starting battery was being overcharged so much it started to boil the water off. Here is what we think happened.

The two key components in this are where the 12V Sensor wire (1 in the drawing) is attached, 2 the house bank or 3 the starting battery and whether the ACR has the batteries combined or not.

Originally we (myself and our experts) believed the 12V sensor wire could go on either bank since we believed when the ACR saw a charge voltage it would combine the batteries, the regulator would then see the combined voltage of all the batteries and adjust the output of the alternator accordingly. We had the 12V sensor wire attached to the House Bank (2).

We still think that at some lever we’re correct in our assumption, however we now believe there is a race condition where the following happens:

  1. The Batteries are isolated because the house bank is not at full charge (Undervoltage on the ACR)
  2. The Engine starts and the regulator is responding to the low voltage on the sensor wire on the house bank (2). It then tells the alternator to  output more power
  3. The ACR can’t “see” the additional power from the alternator because the batteries are not combined so it tells the alternator to output MORE power.
  4. Now the ACR wakes up (or its sample frequency is less than the regulator) and it sees too much current on the Starting battery and now does not combine the batteries because there is an Overvoltage situation on the starting battery.

The basic problem was the ACR didn’t combine and the regulator was getting mixed signals by monitoring a bank that was not being charged, since the ACR did not combine, while simultaneously charging the hell out of our starting battery. We believe this is what was happening at sea. We know for sure we have reproduced this at the dock.

In order to eliminate this we moved the 12V sensor wire from the house bank to the starting battery. Now regardless of if the ACR combines the battery banks or not at least the regulator is monitoring the voltage of the battery is charging when the ACR has the two banks isolated.

We tested this today and we were not able to get the regulator into an overcharge state. We’re going to test a few more times over the next few days. We’re also going to contact Balmar on Monday and Monty at Englund Marine is going to contact Blue Sea Systems to confirm what we believed happened and that our fix is correct and also just to check to see if they already know something about this happening before.

Another day another thing learned…. ya gotta love it! (DISCLAIMER: We’d love it a lot more if it weren’t foggy and rainy)


Battery and Alternator Upgrade

Posted on Tue 20 September 2011 in Systems - Electrical

We’ve hinted at bits and pieces of this along the way, but I wanted to write up a more formal review of the changes we made this week while we had the engine out to replace the fuel tank.

Our original battery system was 2 banks of 4 and 2 6Volt batteries that were combined to make two banks of 220Amp Hours and 440 Amp Hours each. This was proving to be a bit limiting. I also suspect our batteries are waning and we’ll replace likely replace them further down the road. However, for now what we’ve done is create on large house bank combining all of these batteries into one 660 Amp Hour bank and we added a second 12V dedicated starting battery.

The new positive post of the new battery is wired directly to the starter and the negative joins the common negative bus in the house bank battery trays (i.e., they are wired together).

We already had a Blue Sea Automatic Charge Relay which combines both banks whenever it sees an adequate input charging current on either bank. For us this means that when the alternator is charging the starting battery it will combine and also charge the House, or when the solar and\or AC Shore Power Charger is charging it the  House it will also top-up the starting battery. This second possibility is called a dual sensing ACR and is somewhat less known about, read the Blue Sea Page on ACRs for more on that.

The battery changes should give us adequate power to not have to run engine for charging as frequently. However our alternator was only 65Amps and it had an internal single-stage regulator.

We upgraded our alternator to a 100amp Leece-Neville 8MR2401UA which was a physical drop-in replacement (same size, bolt pattern etc.) as our smaller 65Amp Leece-Neville. This was the maximum size we can run our engine with a single 1/2” belt.

We also replaced the internal regulator on the new alternator with a Balmar MC-614 three-stage or smart regulator.This regulator senses the voltage of the battery, temperature of the battery and the alternator and adjust the output of the alternator to provide the best charging current given the state of the batteries and the environment conditions.

The process seemed like it was going to be:

  1. remove the old alternator form the engine
  2. remove the internal regulator from the new alternator and install the conversion kit to allow the alternator to be controlled by the external regulator. There are excellent step-by-step instructions on that here.
  3. Bolt the new regulator onto the engine
  4. Wire the external regulator to the alternator, Ignition (or a pump driven solenoid which turns the regulator on and off) and its sensors to the battery bank (temperature and voltage) and alternator (temperature)
  5. Mount the external regulator

Seems pretty straight-forward and in fact all of that took a few hours. This is where easy goes crazy…. I was doing this over the weekend and all of the pre-tests Balmar says you should run using your voltmeter were not working properly. I spent at least a day tracing wires all over the engine compartment, under the cockpit floor and the lazarette to ensure I was wiring the thing correctly. But despite seeming to be wired correctly, in the end it wasn’t working right and the problem had to do with how much the new alternator and the old alternator differed from each other. The old alternator was case-grounded which means it was grounded through the way it was bolted to the engine. The new alternator was externally grounded which means you need to run a wire from the negative (-) post on the alternator back to the negative (-) on the batteries (our your common ground).

It took about an hour on the phone with Rich from Balmar and his patient troubleshooting guidance (and an emailed picture of my wiring) for him to come to the conclusion about my ground problem with the alternator. We borrowed a jumper cable from the always helpful Kyle Cox at Tarheel Aluminum Fabrication (he made our tank) and we tested our theory… BINGO! Everything was working yaay!!! Phone support, let me restate that. Knowledgeable, technical, skilled phone support is awesome thank you Balmar!

Now our alternator and regulator are working properly!


Trying to wrap things up

Posted on Mon 19 September 2011 in Fuel

We're still in Charleston. Still trying to get all systems back online. The main part of the project removing the engine and putting in a new fuel tank are completed. Friday we along with Kyle from Tarheel Aluminum Fabrication lowered the engine back through the companion and set it on its new mounts! Saturday we finished hooking up the engine, new 100amp alternator and external three-stage regulator. This morning we start the engine for the durst tine and it fired right up, but the regulator is not coming on, which means we can't charge the batteries without shore power. the engine is also running a little hot.

I spent most of today working on the regulator with the voltmeter checking how things were hooked up. I won't bore you wight the details on that, but I think it's a problem with the ground and a call to Balmar tomorrow should resolve that.

As for the engine temp, we need to make sure there's no air in the cooling system which seems pretty straightforward.

In addition to all that Dawn has also been working n some teak projects, stripping the cetol from the hand railings in the cabin top and she sanded down the campionway hatch boards and trim. It's going to look amazing when she's done!!!

We are definitely feeling the need to head south, but also seeing that the immediate weather patterns aren't looking great either. When the engine is 100% we'll start looking to pick our window to jump to SF or maybe another intermediary stop like Port Orchard or Eureka.


In the Yard

Posted on Thu 08 September 2011 in Systems - Engine

This morning we motored over to the yard docks so we could start working on removing the engine so they can pull it tomorrow, pull the old tank, make us a new one and then we can put it all back together.

Dawn and I spent the day removing hoses and wires, labeling everything and taking pictures. The idea of helping to remove the engine sounded very daunting to me at first, but now I think its pretty easy. Things have gone well and very few extra surprises yet. All of the bolts on three of the four engine mounts turned very easily. I think the fourth is going to require some special yard magic. The foot at that location is also cracked so a little welding repair will need to be made as well. I’m not really worried about that, this yard is mostly for fishing boats, they seem to do a LOT of welding here.

If we weren’t here then tomorrow would have been our next chance to jump down the coast. It’s looking line the next opportunity won’t be until Tuesday or Wednesday next week so being here isn’t too bad.

I’ll be sure and take pictures of the engine coming out as well as a review of the yard and the people here when it’s all over. I’ll also do a technical write-up on pulling the engine so all you who are going to have to do this yourself someday can get a feel for what’s involved.


Very Busy Getting People Married

Posted on Fri 15 July 2011 in Destinations - San Juan Islands

Sorry for such infrequent updates, but we’ve been busy getting all of our friend married -- wedding number 3 in as many weeks is Saturday -- as well working on boat projects.

Wedding number 1, over the 4th of July weekend, was in Cle Elum. Lars and Jenny we’re absolutely beautiful and to be able to have all of our Burner friends together for a solid three days was an absolute gift. The weddding was meant to be a “Goofball Wedding” so I had to bust out my green PeaBear costume for the ceremony! (Have to find a pic of that still)

Wedding number 2 was in Roche Harbor and we took the boat up. The weather didn’t cooperate too much with sailing, but we did get a few hours in, used the Hydrovane and even had to put a reef in the main, I was glad I finished finished installing the reefing hardware on the main boom the day before!

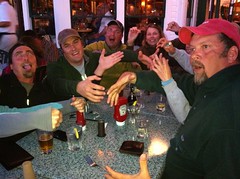
Julia’s and Jason’s wedding was held at anchor on the biggest spinningest raftup I have ever been on. The AnderGuards (as we call them anyway) are an awesome couple and know how to throw a party. Some of us water people went ashore to partake of the Roche Harbor Bar as well. The lamb burger isn’t all that, skip it. The rum runner is delicious, have 3 instead!

We're all hugs for Dave and Jen

On the way back we went to Blind Bay on Shaw Island. We went for a long walk on the island around the bay and enjoined some very good ice cream from the Shaw General store 
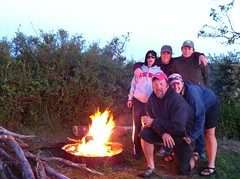
which first opened in 1899!! That night we took a dinghy of wood to Blind Island for a night of fire and marshmallows.

The gang at Blind Island State Park

The night after was spent in La Conner, WA after handling the tricky navigation of the Swinomish Channel. The depths in Swinomish are supposed to be 6’8” at low tides, but can be a bit all over the place (usually deeper, but sometimes not) given that they don’t’ dredge it as much as they used to. La Conner is very cute town and if the Swinomish channel has been scaring you off, don’t’ let it. Just plan to go in with at least +X feet of tied where X = (7’ + Your Draft + 2 feet) and you should be fine. Also, don’t’ leave La Conner until you have similar depths. Aside from that I think it’s very doable but WAY easier for those shallow draft Bayliner wake machines.

Since we got back I changed the oil, installed new oil cooling lines which were leaking, changed the raw water impeller and the zinc in the heat exchanger.

image

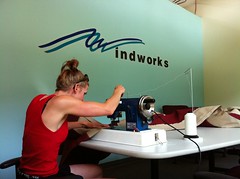
Dawn has been working on organizing our medical kit and working on the sail covers. Because it was too windy to sew on the dock, we spent about 4 hours in the conference room at Windworks sewing all the main stitching for the covers. Dawn ran the machine and I manhandled the cloth to allow her to sew more easily. We can’t thank Greg and the staff at Windworks enough for loaning us the conference room. That was absolutely awesome!!

Wedding number 3 is tomorrow, I’ll save that for the next post, and we’ll do some more technical posts on the sail covers as well.

whew… I’m going to need a vacation after this 3 week vacation!


New Year, Same boat projects

Posted on Sat 02 January 2010 in Projects

Ticked a few things off the to do list the past few days.

New Years Eve day, Dawn worked on the masts and booms filling all the holes we don't need anymore with Belzona 1111. Thanks to at for helping us get started. Dawn is really good at these kinds of projects that require being neat and detailed oriented. I'm better at breaking things an making a mess.

The bilge hoses have all been replaced. This took a little longer than planned because I used stiffer hose which added some unforeseen complexity. It also became delayed due to an apparent shortage of 316 SS hose clamps in the size I needed. Fisheries Supply in Seattle is horrible at managing their stock, but their prices are better than West Marine. Included in this a Perko bronze strainer for the manual bilg pump and an inline check-valv on the stern end of the secondaylarge bilge pump. I am considering walling off the aft-most section of the bilge to minimize the area which stays wet. We would place the primary pump in that section but if we had more water than that then it flow over the wall and we would kick on the secondary pump. We also need to put a float switch on the primary bilge pump, currently it is only enabled by the breaker switch.

The Walter Machine RV-20 V-Drive has a raw water cooling chamber on the top of it which is prone to corrosion. Eventually it can corrode through allowing sea water to mix with the oil in the bottom half of the v-drive where all the gears are. This would be bad. Several owners have cleaned up the corrosion and used Marine-Tex to protect the area before hooking everything back up. Some owners (including my surveyor who also owns a Pearson 424) have removed the raw water cooling altogether. The corrosion in my unit is so bad that it damaged one of the bolt holes used to attach the top plate to the v-drive so I am going the route of leaving the unit dry. So now instead the raw cooling water going from the strainer to the v-drive and then to the egine it now goes directly from the strainer to the engine. I will install a temperature gauge on the v-drive to monitor it for overheating and I left the hoses in place so I could hook it up back if it ever did overheat. Eventually we will probably replace the v-drive, but that is not something we wanted to do right now.

I have not finished this yet, but the anchor washdown pump was not protected by a strainer. I purchased all the hoses, clamps and the Sherwood strainer. This will get installed completed tomorrow. I would have finished it today, but I forgot to buy the mounting bracket.

I also capped off the vent thru-hull that used to be part of the holding bag system. I will also being putting a plug on the inside portion of the deck fiting for pumping out. I thought about removing and glassing these closed, but I don't this it's neccesary, capping them of is adequate redundance. I also put a plug in the thru-hull I eventually plan to use for the water maker. It has a ball valve, but I like the added security of the plug as well. This is something we'll do just before we plan to leave.

All in all it was nice to tick a few thing off the list, but we still have a ways to go!


Next set of things in the refit

Posted on Thu 19 November 2009 in Projects

The boat has been moved form sitting in the yard where the bottom was prepped and painted, some keel damaged was repaired (oopsy), the v-berth was prepped by me, and the windlass was removed. The boat is now sitting inside the prep tent. I’ve not been to it yet, but I’ll go tomorrow and take a bunch of pictures.

from gave me a call about some blisters he saw along the waterline. We’re not sure if it’s just a paint issue or if there is some gelcoat damage. We’ll know more when they start to prep for painting. This is one of those “known unknowns” which could be nothing or could be expensive. We’ll find out soon enough.

The yard is prepping the boat for repainting the stripes, and I aguess polishing the hull as well as a bunch of fiberglass projects including closing up some thru-hulls, reinforcing the v-berth and moving the windlass. I also have a lot of chores to do:

  • Grind off a thru-hull so it can be pushed in and then glassed closed.
  • Remove the teak trim from the deck where the windlass was removed.
  • Cleanup the water jacket in the VDrive and sand off the corrosion on the input shaft.
  • I have a lot of measuring to do to determine the wire lengths needed for the new electronics and mast lights. I’ll start with just the lengths needed for the masts plus some extra so I can put in terminal blocks or connectors which will allow the masts to be pulled without cutting any wires.
  • I also want to work on replacing the hoses below the waterline. I’ll pull the hoses, measure them and pickup new hose from Fisheries or West Marine.
  • Dawn is probably going to star on the portholes or at least getting all of the pieces in place to make it happen.

Very busy weekend!!