Mastodon

We're looking for the trash fence...

AIS is worth it !

Posted on Mon 11 July 2011 in Gear

This has been our first time out with AIS on the boat and I must say it is absolutely worth it. Being able to see exactly where that tug is headed and it’s speed is very useful. Even more useful is when you want to cutoff the shipping traffic separation lanes, you can “see” way up the sound and know whether or not a freighter or tug is coming around that next bend.

If you have been unsure about AIS… GET IT !


Dinghy Gasoline Fuel Filter: Blame it on the E-E-E-Ethanol

Posted on Mon 13 June 2011 in Fuel

DSC00822

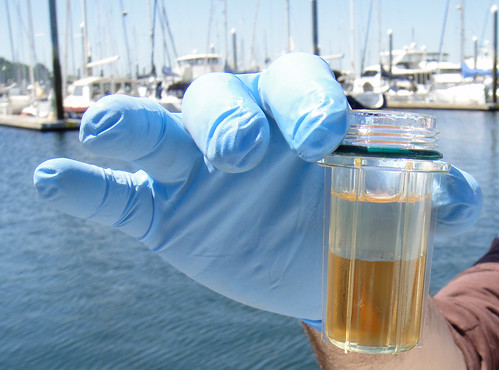
That is not a new layered drink I’m perfecting. It is a picture of what my newly installed inline fuel filter for the dinghy outboard caught on it’s inaugural run.

Last winter we were bad outboard owners and did not winterize the outboard, nor did we dump the gas into the car. So this winter the outboard wouldn’t run. I took it to the dealer to have the carb cleaned and we dumped the fuel. Roll forward several months, with new fuel (<1 week old) and supposedly clean tank and with clean carbs and after about the first hour of use it was conking out unless you left the choke open or closed the choke and quickly gave it half-throttle. It would not idle in gear.

I checked the inline filter in the engine and it was clean, but it only collects particles, not water. I decided the fuel was bad, but couldn’t prove it, so I got a RACOR 025-RAC-02 filter designed for outboards. Installation is as simple as mounting the housing to the dinghy transom, cutting the fuel hose and securing it with some hose clamps. When I ran it for the first time it clogged with water (that is what is floating on top) and BINGO I confirmed that a) this filter is awesome and b) I really did have a fuel problem!

I poured all the fuel into the car, rinsed the can with more fuel, poured that in the car and then set that can aside to let all the residual gas evaporate (it was sunny that week). We then bought an additional fuel tank because I figured this was not going to be the last time we had to do this. In looking at the new can I think the vent is vastly superior to the old one. The old one is basically a plastic screw you loosen to let air in while running. The new one also is loosened like a screw, but it seems to have an openclosed position, not adjustable and it also appears to have some sort of gasket or pressure closure so it only opens when it needs to. I think the new one will let in lass condensationrainetc. I do think having two fuel cans is a good idea either way.

Of course I later noticed as I walked the dock that one of our neighbors has one too… ah validation.

And with that bit of DIY help, I will leave you some music to go with this week blog title…

There’s no way I wasn’t putting this in here… Blame it on the Alcohol


Our First Weather Fax

Posted on Fri 10 June 2011 in Systems - Communications

I’ve started devoted a little bit of time each night to playing around with our ICOM M710 SSB Radio. We’re sitting in the middle of a marina surrounded by aluminum masts so I assume reception or transmission is going to be greatly impaired. Thus far I’m focusing on what I can hear and then I’ll work up to transmitting.

With that in mind, two night ago I was tuning around to find some Shortwave broadcasts and was able to hear China and Cuba, not too shabby. Last night I use the GetFax module in Airmail to receive (or download you might say) our first weatherfax. Weatherfax will be critical to our onboard weather forecasts and route planning so it felt pretty good to see it work properly on the first try!

Here’s our first weatherfax image.

Our First WeatherFax

I’ll do a video podcast at some point of the image actually downloading its cool to watch, and it will be impressive to all my geek  friends to see just how SLOW it is. There’s no broadband at sea (well that we can afford).


wordpress ios app test

Posted on Wed 08 June 2011 in Geek

is location working?


Chainplates : Before and After

Posted on Tue 31 May 2011 in Projects

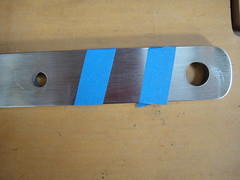
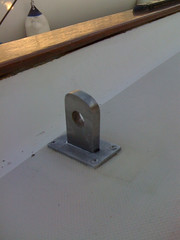
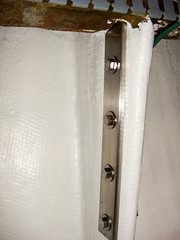
Here’s a series of shots of polishing and installing our chainplates. We polished them by hand starting by cleaning them with water and a scouring pad, then sanding them with progressively higher grained papers. The first go was with 100 grit and we ended up at 1200 grit. Mounting the paper to a board or a table was helpful, but this is intense labor and is very hard on the hands. However, paying someone to do it ridiculous. We did not put the chainplates (or any of the rigging we polished) on an actual polishing wheel, the 1200 grit seemed like it was as good as we were going to get.

As as DIY projects go, this is pretty easy one and just requires sandpaper, a bunch of free time (or late nights in my case) and a desire to stick through it.

Thanks to Port Townsend Rigging for the tips and the encouragement!

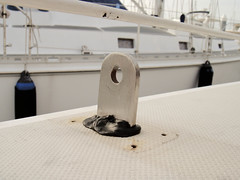
DSC_7136 Here’s the chainplate pulled and lying on the deck when we were in the paint shed back in November 2010.

DSC00323 After cleaning them up we marked where the deck would be and covered that area with butyl.

DSC00340 The butyl was then tamped down by hand until it was a bit recessed to the deck (no shot of that)

image The small space was then filled with Sika Flex, the chainplate covers were installed and any excess Sika Flex was cleaned off.

DSC00342 A shot of the bolted on chainplate and the green bonding wire (which were also replaced) from below decks.

These pictures were taken in May 2010 and thus far we have had no chainplate leaking. (knock on teak)


Marking the rode

Posted on Fri 27 May 2011 in Systems - Ground Tackle

When we got to Poulsbo last weekend, we were using the ground tackle for the first time we weren’t sure we were going to be able to decipher the marking system we’d done months before. We actually had no clue what we done. However, once the chain started to go over the side it was VERY easy to figure out and required no secret decoder ring. That’s ladies and gentlemen is what we call good design. Winking
smile

Some people use paint or other flags, we used colored zip ties (which is also common) and this is our color coding scheme:

  • White – 10 Feet
  • Black – 50 Feet
  • Red – 100 Feet

The way the system works is you add up the zip ties.

3 white = 30 feet\ 1 red + 1 Black + 2 white = 170 feet

Very intuitive and easy to maintain by just replacing zip ties when they inevitably break off after a while.


Viking Fest Poulsbo, WA

Posted on Wed 25 May 2011 in Destinations - Poulsbo

Crappy Pacific Northwest weather and constant work on the boat have kept us from taking the boat out, but this passed weekend Dawn and I took the boat out for out first trip since December. We organized a veritable flotilla of boats for a Poulsbo raft-up and viewing of the new Pirates of the Caribbean movie. Here are few pics of Viking Fest things. My main camera wasn’t charged up so these are just from my iPhone.


Palarran Time Warp to Poulsbo

Posted on Wed 25 May 2011 in Destinations - Poulsbo

Cappy Bone and Tawn from s/v Palarran have another great video!


First Trip of the Year

Posted on Fri 20 May 2011 in Destinations - Poulsbo

I’m writing you from the comfort of the nav station while securely anchored in LIberty Bay just off the shore of Poulsbo, WA. What a great night of sailing and seeing all of our hard work actually working! We took a little detour into Port Madison (hey where’s the Bridge??) and so we ended up arriving after dark, but not to fear. We were able to set the hook with the new windlass and chain locker configuration. We flipped on the foredeck light so Dawn could see me while I worked the windlass and she drove the boat. That was awesome because we could still use our hand signals for anchoring instead of having to shout.

But on the way over it was pure bliss to raise the sails and shut off the engine! We were doing well over 6 Kts in 18Kts of breeze as we crossed the sound, absolute JOY.

Right now I’m mooching someone's wifi ashore and the wifi antenna and Ubiquiti bullet are working pretty well for free internet! We still have a lot of thing we want to do, but man is it nice to get out and enjoy some of the fruits of our labor.

Tomorrow we’ll be joined by Danika, Palarran, Andante, and Defiant. We’re all going ashore to see the new Pirates of the Caribbean movie at 10pm, but all day tomorrow it’s Viking Fest in Poulsbo and we’re definitely going to go ashore and plunder some savages!

Goodnight and pleasant dreams !


Spectra Capehorn Extreme Mounting Location

Posted on Wed 18 May 2011 in Systems - Plumbing

Capehorn Spectra Extreme Mounting Location

Last night after about 2.5 hours in the sewer I finished mounting the Spectra Capehorn Extreme membrane and clark pump unit. The unit is mounted on a piece of 3/4" marine grade plywood with 1/4"-20 machine screws and tee-nuts on the back, or in this case the top of the board. I took the unit into the sewer and propped it up on tupperware containers to get it roughly into place. As I laid on my side in the sewer I marked the final location.

The board itself is mounted to two cross-beams supporting the salon floor. I originally had planned to mark the location, pull the unit out, remove the board, then mount the board alone and then screw the unit back to the board. As I had everything in place, I realized getting to the machine screws was going to be a lot harder than getting to the lag bolts so I decided to mount it en masse, with the unit attached to the board.

Putting in the aft bolts (the ones you see in the pic) was fairly easy as the sewer is deep and there is a decent amount of room between the rear edge of the watermaker and the refrigerator compressor which sits aft (and out of frame) of the watermaker. Because the sewer is not as deep as you go forward and the mast and maststep impede access, the forward lag bolts are not as easy to reach. Given the impinged space I was only able to get 5 bolts into the board. The forward outer most corner is not bolted. However, the frame of the unit is wedged between the joists and the hull so it's not going anywhere and there is not room for it to wiggle.

I have some concerns that the fact the unit is wedged will cause a lot of noise to be transferred to the boat, but I won't know about that until we turn it on. If it needs to be moved I think the only option will be to angle it more or to find a completely different location. Hopefully it will be fine where it is.

This project isn't done yet, but this was a big step. The membrane is about 40" long and it either takes up an entire settee or the entire workbench in the aft cabin, so just getting it out of the way makes the boat tremendously more pleasurable to liveaboard especially since the other settee is covered with the contents of the hanging locker where all the pumps and controls for the watermaker are installed.

Next steps are to finish all the plumbing and then setup a test run with Emerald Harbor Marine who will come out and look things over before we power it on for the first time. Sooo clooooose to done... ;-)