Mastodon

We're looking for the trash fence...

Windlass Project is ramping up

Posted on Fri 24 September 2010 in Fiberglass

Preparing to make a huge mess

DSC_8889

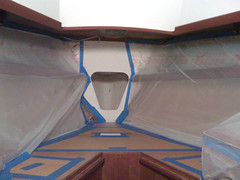
This week I got a quote on the work to create a proper chain locker. That estimate was higher than I thought it was going to be so I’ve started to do some of the prep and demolition work myself.

Pictured on the left you can see that I’ve bagged off the beautiful ash battens that Dawn installed and closed off the storage under the v-berth as well.

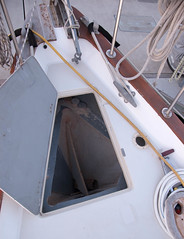
On the right (if this works), I started doing some demolition. I cut out the floor of the anchor locker and now it’s open to the lower area and will create what I’m calling a chain locker.

When this is all done, the deck will be cut open and a new solid deck without a door is what you see. It will be ship shape and water tight, just like we like it!


Making a windlass plan of attack – Step one: Pontificate

Posted on Wed 18 August 2010 in Projects

I have and plan on reusing the Lofrans Progress that came with my boat. The motor is the same large one that comes with the Tigres.

You may remember that my windlass was originally mounted so far aft that the hawse pipe went through the v-berth and into the decommissioned water tank; basically rendering it impossible for use to sleep there comfortably. This winter I removed it had the the deck closed up and am now making my plans to place the windlass further forward on the deck and to run the chain through the shallow anchor locker and into the unused chain locker below.

Seems as though I have one of four choices:

  1. Place the windlass forward of the locker and use a PVC hawse pipe to run the chain aft to achieve adequate fall. Meridian has this kind of setup as does Syringa.
  2. Place the windlass motor and mount just aft of the locker and use a PVC pipe to run the chain foreward and through the locker. Parallax has this setup with a similar if not the same windlass.
  3. Build a stand for the windlass in the anchor locker at the highest point of the chain fall and modify the door to go around the windlass. There are some horizontals which have been done that way.
  4. Install the windlass on the door itself (or a beefed up hatch without hinges) and essentially leave the locker closed except for maintenance purposes. Another derivation of this is to bolt down a more permanent opening, possibly thicker and have it closed with a more bolt down fittings like they use on aircraft.

1 and 2 seem like the least work, but I’m worried about how well the chain will run. I don’t want to be having to deal with kinked up chain in the anchor locker all the time. Also number 1 doesn’t really seem possible on our boat because we don’t have a bow sprit for our anchor and our anchor comes all the way back to the deck. I also plan to put a padeye on the deck just aft of the anchors for the solent stay so again number 1 seems like a no-go. If I can alleviate my concerns about the flow of chain then number 2 is probably the best idea.

number 3 sounds a lot of work and I’m not sure how to make the door water tight once I cut into it. I also am not sure that the drive shaft of the windlass would be long enough to reach through the entire pad.

I think number 4 would be a big upgrade. It would also close off the deck better than the door does today. It would however remove a storage spot from the foredeck, which is handy for wet  things like hoses and our folding anchors.

SO number 2 and number 4 seem like the most viable options at this point with number 2 probably winning out based on the simplicity. If you have any thoughts please do chime in.


Maretron NMEA 2000 Network and Instruments Installations

Posted on Fri 06 August 2010 in Maretron

20100806-DSC_8802

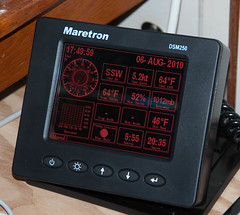
There’s a shot of my Maretron DSM250 (in red on block mode) displaying data from my NMEA 200 network I finished roughing in last night (or I guess this morning) about 0200. I’m calling it a rough-in because I still need to go back and secure all the wiring, mount the display and the GPS, etc. but I was to plug it all together, fire it up and it worked right out of the gate!

20100806-DSC_8803

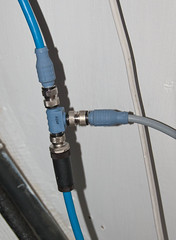
Here’s a shot of the a “T” installed showing the backbone in blue and the drop cable in grey. The black fitting is a field installed fitting whereas the other two are factory pre-installed fittings. The field installable connector has some pretty small screws and was a tad tricky to line everything up, but that is probably due to my large meat hooks. I was able to do it just fine. The waterproof fitting that goes over it all was very tight and I’m sure it has a great seal.

right now I have the following in my system:

I plan to add a depthspeedtemperature gauge to replace my Standard Horizon DS50 depth only unit, but I’m waiting for Airmar’s DST900 to come out (it’s a year late according to rumor) which has the D/S/T and no moving parts! That will be awesome! For now, I’m going to Magruber the DS50 onto the network and maybe if that works fine I’ll just live with that (hurry up Airmar!). We also want to add a rudder angle indicator. I just haven’t gotten to that yet.

Tonight I’ll secure all the wiring and figure out where the GPS will be placed.


Dawn up the mast

Posted on Tue 03 August 2010 in Destinations - Shilshole Bay Marina

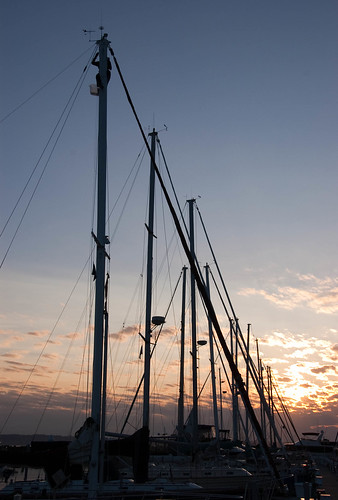
Here’s a shot of Dawn at the masthead installing the stop on the sail track as the sun sets at Shilshole Bay Marina. You can see a close-up here.

20100802-DSC_8796

I would have installed it when the mast was in the yard, but it was missing for awhile. Now it’s installed back where it belongs.


NMEA 2000 wiring planning

Posted on Sat 31 July 2010 in Projects

Maretron Micro Network Diagram I’ve mostly been working on the rigging lately, but tonight I’m thinking about the NEMA 2000 powertap installation. The Maretron powertap looks like a normal NMEA 2000 T but it has MIDMicro cord coming out of T which you wire up to the DC power system in your boat along with a 4amp fuse (See yellow powertap in the picture). Maretron has a good knowledgebase article on how to do the install but in summary you wire a couple of wires to the 4amp fuse and DC +and the rest to DC –.

I have some other DC wiring I need to clean up that is wired directly off the batteries with no fuses and I don’t want to use a bunch of inline fuses, so I’m going to use a Blue Sea Fuse Block to fuse all these individual items, but do so in a way where I have a single spot to do troubleshooting and add-on future circuits.

I’m hoping to pick up the fuse block tomorrow so I can put in the T which is the first step to getting my NMEA2000 instruments online.


Checking things off the list

Posted on Fri 09 July 2010 in Projects

More checks from the 4thof July 3 day weekend:

  • Dr LED Kevin spreader lights wired and functional. They need to be aimed to point at the proper deck area still.
  • Cleaned up a lot of stuff. There has been a lot of extra tools and supplies on the boat. Some of it is extra gear we will sell at the next Fisheries Swap Meet, the rest of it was recycled, trashed, or now at the workshop. We have some ash lumber for doing battens if you’re interested in that let me know. We also have a not-straight 1-1/2” bronze prop shaft that could milled down into a smaller straight shaft I assume.
  • Took a ride around the marina in the dinghy on oar power. Dawn loves to be rowed around like a princess. Winkingsmile

Checks from this week:

Mainmast wiring completed !!!  Fly me to an aircraft carrier; Mission Accomplished!! This was huge. I can’t tell you how many WEEKS I’ve spent working on the wiring in the mainmast to have everything working feels awesome!!

  • The following are now all functional: Aquasignal Foredeck & mastlight (aka steaming or masthead light, OGM LED TriAnchor (Tricolor, Anchor with photodiode & Strobe)
  • The TriAnchor is absolutely awesomely bright. I walked around the dock and it was absolutely the brightest thing in the marina including all the lights on shore.
  • The DC breaker board is labeled properly. I used white P-Touch labels for this, I eventually (read maybe never) want to pretty that up.
  • Every DC (+) wire in the wiring closet is now properly labeled. I love my P-Touch (we call it a Pea-Touch) Industrial Labeler!!

Chris Tutmark did the initial tune on the rig.

Put the outboard on the dinghy and took the Dinghy Princess for a ride last night. The ob fired up on the second pull after sitting on the stern pulpit all winter with no winterization. Yamaha is the awesome!!

2011 WA Vessel Registration sticker affixed

Dawn painted the interior wood around the portholes in the head & shower and put the trim back up as well. Just need to re-attach the drip rails which she sanded and polyurethaned.

Lots and lots of stuff completed… many many pics to take and then some write-ups on some of the systems, how I installed things etc.


Day two .. Bring on the to do !

Posted on Sun 04 July 2010 in Projects

When it comes to list it’s important to remember that length doesn’t matter as much as the magnitude of the accomplishment. Here are today’s magnum sized check marks:

  • Porthole installed in the head and shower. This is the first wave the redo on the portholes. We completely pulled down the drip rail and interior paneling, put up new paneling and (done before today) and installed the portholes with an interior teak ring that allows them to fit better. This was a bigger PITA than planned because one of the “matching” teak trim pieces needed about 3 hours of sanding to fit its matching porthole.
  • Lowered the dinghy from the rafters at the workshop, carted it down to the marina, pumped it up and cleaned it. Dawn took it on a test row and look especially cute doing so!
  • Re-installed the swim ladder. Dawn had some ambitious plans to add teak steps to it, but with the plan to eventually install a wind vane on the stern that didn’t make much sense. We did clean it up though and it looks a lot better.
  • Finally finished off the horrible Ballard organics hand soap which left residue on everything and everyone.
  • Rain and poor attitude lead to a two hour rain delay at Ray’s. don’t’ order that blend they’re offering by the glass. It’s nasty; I sent it back. Just order a bottle of the 2007 Sharecropper’s Cabernet \$30 and easy peasey (no offense Susan).
  • Watched at least 8 firework shows from Golden Gardens. What a great way to wrap up another great day!

Dremel Tools are Good !

Posted on Tue 29 June 2010 in Projects

DSC_7711

Both sides of this used to look like the right side. A little stainless steel wire brush action with the Dremel and we're approaching nautical beauty. Do you own a boat? Go buy a Dremel tool !


Big Weekend

Posted on Mon 21 June 2010 in Projects

I love to update the blog with checkboxes as we go. Feels good to celebrate the wins and document our progress. As you know we’re working toward stepping our masts on Thursday 24 June.

I got all the pins from Andersen Machine Shop in Port Townsend and they were beautiful. Had a slight mishap with them last week because I put in an incorrect dimension (too long) for some of the pins, but with PT all mail is basically overnight so we were able to send them back have them cut down and get them back in 2 days! I highly recommend Andersen Machine Shop. Olaf is a very nice guy and was very helpful. He made our pins on his CNC machine, they look awesome.  With pins in hand I was able to attach all of the rigging to the masts! I did all that in the pouring “Junary” rain we’re experiencing in Seattle this summer so no pics yet.

On the boat Dawn has been working on the ash battens to line the aft berth, v-berth and open lockers.
DSC_7633

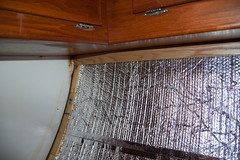
First she’s lining all our lockers with Reflectix Insulation which looks like aluminum foil bubble wrap. We’re laying it in loose along the hull NOT gluing it down. We don’t ever want to have to scrape the hull for a month again. The insulation will keep a tad warmer here in Seattle and a tad cooler in the Tropics. It’s pretty cheap, you can get it at Home Depot and its easy to work with.

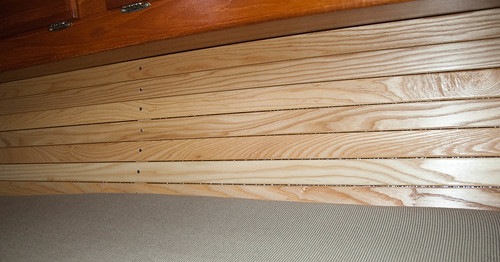
Here’s what the battens look like when they are installed. Dawn as always does gorgeous work when I stay out of the way. ;-)
DSC_7635

The only thing left to do before we step the masts on Thursday are to install the mast steps and make some leather grommets for the wiring exits on the main mast. After that I’ll remount the booms and winches along with a couple other things. Right after we tune the rig we should be able to sail again!


The date is set for re-stepping the masts ! ! !

Posted on Thu 17 June 2010 in Projects

I called the yard and set the date for re-stepping the masts ! By this time next week we should have the rig back up !