Mastodon

We're looking for the trash fence...

Progress on the v-berth

Posted on Mon 07 February 2011 in Interior

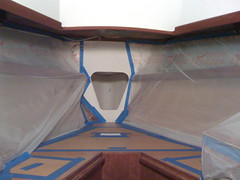
While my clavicle has been healing Dawn has been busy as monkey working to convert the shelves along the port and starboard sides of the v-berth into cabinets. Along with that she's also been working on turning that v-berth seat that a lot of boats have into a cabinet as well. Here's a quick rundown on the progress thus far and the proces:

  1. First she pulled the drip rail off the shelves so the new cabinet face can attach directly to it.
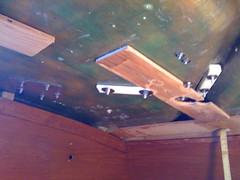
  2. Directly above the shelf edge under the cabin top she screwed in two long 1"x1" boards to act as cleats to attach the top edge of the new cabinet face
  3. With that done she  made all the templates out for both the port and starboard cabinet faces and the front of the cabinet at the head of the v-berth out of  3" wide strips 1/4" plywood. She takes the strips, clips them in place on the top and botom and then hot glues pieces to the fore and aft edges. This leaves us with a perfect template of the outer edges of the cabinet face.
  4. The templates were then taken to the workshop and we cut out the plywood pieces to match the templates. These plywood pieces will make up the front of the new cabinets. The cabinet doors will attach to these boards as well.
  5. The cabinet under the head end of the v-berth required one additional modification which was to route a 1/2" groove into the bottom of the normal removable seat board so it will slide over and help secure the new cabinet face.
  6. With that done you would think the cabinet faces would just slide right in, not exactly. Not 100% sure exactly what we're not doing right but the final boards always require a lot of sanding to make them fit into place. I know for one we didn't account for the angles of the bulkheads at either end, so in effect the board is always a hair long. She handled that by using the angle grinder to sand back the high spots until the board slid into place without as much pushing and shoving.

We ended the weekend with one cabinet face  fit and two more to go. The next steps after the cabinet faces fit correctly is to determine where the cabinet doors will be placed exacltly, to cut out the holes, place the hinges and latches. With that done we will install the new cabinet fronts.

Many pics and more details to come, I just felt bad for not giving you all an update.


We did a lot this holiday season

Posted on Mon 03 January 2011 in Projects

We make lists and we check them thrice and then we check them thrice more and then we check ‘em off and drink! You can expect more to come on most of these, I just wanted to make a big list and check it thrice! ;-)

  • Finished lining the foot locker in the v-berth with cedar, put hinges and a latch on hatch.
  • Painted the tabbing connecting the shelves in the v-berth to the hull. Dawn is getting ready to convert this into area into cabinets as well.
  • Dissembled the pedestal canvas cover, bought new canvas and made the initial template which is step one in our first canvas project with the Sailrite LSZ-1 we bought.
  • Fixed a leak on the toe rail into the locker in the head
  • Fixed a spot on the toe rail t-track where the cars would not slide though one section of the t-track by removing some of the teak on the rail with chisel and sanding it down. This was probably due to some toe rail rot or something like that, the track is actually recessed into the toe rail a bit in this section. Not sure… we’ll probably need to replace this section of toe rail in the next 5 years.
  • Finished all the final mockup and dry fit for the Maretron DSM250 to be mounted in the cockpit under the dodger (more on that to come). Almost completed this project, no really almost..
  • Re-bedded all the hinges in the lazarette with new bolts and Sikaflex 295 with the goal of eliminating leaks from the bolts
  • Chain Locker and Windlass complete
  • Installed the last two Lewmar D2 rope clutches on the mainmast
  • Installed the bottom half of the hardware for the mast end spinnaker pole (pad eye and cheek block)controls (the line is still being shipped)
  • Replaced the vent hoses on the water tanks adding proper vented loops and having them drain to the sewer instead of inside forward lockers (really, in the lockers)
  • Pulled the dinghy from the water, cleaned it and took the Yamaha F8 to Jacobsen Marine. It wasn’t running smoothly and I don’t have the time to deal with it right now so we took it to “the man”. Probably just needs the carbs cleaned. I also learned that the right side to set the the outboard on is the other side from the one I had set it on, so we had a bit of an oil leak. If you have a Subaru Forester the cargo liner for the back is a very very nice to thing to have!

Now it’s time for a glass of Balvenie Portwood !


New Chain Locker and Windlass Relocation Complete

Posted on Thu 30 December 2010 in Projects

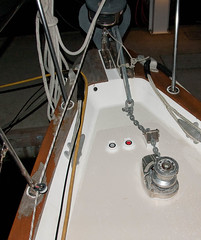
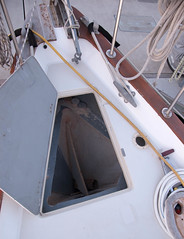
Before Foredeck Before

Main Berth Before

After After

Tonight we marked the chain and loaded it into our new chain locker with the windlass. This project has been over a year in the making since it was November 2009 when we removed the windlass from it’s original location and closed up the holes in the deck.

The reasons for moving the windlass were many, but the main ones were to remove the rubber hose hawse pipe from the middle of the mattress in the v-berth (which prevented any cuddling) and to create a proper chain locker in the bow below the original (and useless) foredeck anchor locker.

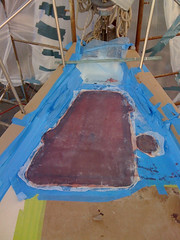
I did most of the demolition and prep work and <<The Yard>> did all the structural and finish work. Here are some shots of the fiberglass work in progress there are more pics on flickr.


DSC_8889

image


DSC_8942

We also installed a bow padeye for attaching an anchor snubber closer to the level of the waterline which is a better angle for the boat to pull on the ground tackle to keep the anchor digging in. It also removes some the up and down motion on the ground tackle as well which should also make the boat rider more comfortable at anchor as well. We used the 1/2” bolts coming into the chain locker to attach an eye nut which I used to attach the bitter end of the chain.

The inside of the locker was prepped, primed and painted by Dawn with Interlux Bilgekote. She used gray primer and white paint to help here see how things were covering. She applied two coats of primer and three coats of paint over the Christmas holiday weekend. She was wearing a full set of coveralls a painters hood and a respirator. I’ve done that when grinding fiberglass and I can tell you it sucks! We originally thought we’d go slap on some paint and go sailing, but it takes 24 hours between coats then you have to sand, clean and put on the next layer. It was not how we planned to spend Christmas, but it looks awesome and I’m confident the fiberglass is well protected!

DSC_8933

Once the paint was dry Dawn literally went inside the chain locker and we shut her into it so she could place two starboard guides on the inside of the bulkhead so our 1/2” inner panel would have a place to rest and line up properly. It basically fits in place like one giant hatch board. This bears all the weight of the chain. I was originally planning this elaborate and over engineered inner hatch that would also be water tight. Instead we put the original cover board back in place with a single screw on the top. We’re going to see how that goes if our toes get wet then I’ll resort to something more complicated. This is inline with the advice from fellow sailors and comparisons to other boats.

In addition to all of that we added proper up and down windlass foot controls (and control box) on the foredeck, port and starboard chain locker drains and just because we were in there doing stuff I replaced the very corroded port and starboard running lights with shiny new ones. We also re-marked our rode, but I’ll save that for another post. There are more posts in the Systems - Ground Tackle category if you want to see more details.

This means we can go sailing and anchor at fun places!! Woo Hoo !!


Relocate, Rebuild and Rebed the Mainsheet winch

Posted on Thu 09 December 2010 in Projects

New winch layout

Backing plates

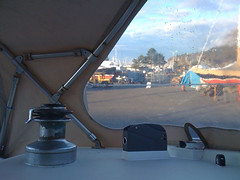
In it’s original, more outboard location, a handle in the mainsheet winch could only be rotated about 1/2 way round because it hit the dodger. to grind in the sheet you had to saw back and forth on the handle. I like to get up on the winch and grind so it needed to move inboard. In order to make that work and have the line run fair (shout out to Brion Toss) I added a cheek block just where the line comes under the dodger to align it to the new winch location (as suggested by Chris Tutmark). This block is mounted to the ridge in the cabin top and through a custom shaped starboard block I made. The rope clutch is also a new addition and replaces the cleat originally used for the mainsheet, it is also mounted on a starboard block I shaped. I added a fairlead for the traveler line so it didn’t rub so hard on the dodger canvas and although it is not in this picture there is a cleat for this line on the deck as well.

The picture on the right shows the backing plates, washers and fender washers used to back the various pieces of hardware all of which are a major upgrade from the very small washers used prior. All of the holes were drilled larger than needed, epoxied closed to protect the core and re-drilled to the proper size. Everything was bedded using Sika Flex 291.

A new mainsheet was made out of 1/2” Samson Trophy Braid because it’s a bit softer in the hand. This has also been installed. There are now only three original lines on the boat, the furling line and the job sheets and they are on the list.


Chain Locker Bulkhead Design and Material Issues

Posted on Wed 08 December 2010 in Projects

Preparing to make a huge
mess

I’m hemming and hawing a bit on the chain locker bulkhead. I need to make a removable panel that keeps the chain and water out of the v-berth. There probably won’t ever be any substantial amount of water in the chain locker, just the normal mess from brining up the chain.

The bulkhead itself is 1/2” thick. The design seems pretty straight forward. I need to make a 1/2” thick piece that fits neatly into the hole and then another 1/2” piece about 1” bigger than the hole. This 2nd piece will be bolted to the bulkhead. Since it needs to be removable and you can’t get to the inside once the panel is in place I’ve decided it will be attached with tee-nuts and machine screws.

I’ve been going back and forth on a couple of things:

Should the panel be bolted on the outside or the inside?\ \ If the panel is on the outside the bolts alone will have to hold the weight of the chain if it rests against the panel. This could be alleviated by putting in a removable set of panel on the inside to bear the weight. A guy at <<The Yard>> mentioned they have done this before and used starboard. Basically it would look like hatch boards.

If the panel is on the inside thee is NO way you’re going to remove the panel without first removing the chain from the locker. This seems like a deal breaker for inside, but I’m already resolved that I will likely add a small water tight deck plate above the panel for quick access to deal with chain castling or other quick inspection needs.

Should the panel be made out of starboard or marine grade plywood coated in epoxy?

Both materials seem fine and I don’t think the plywood would be much cheaper. Joining two 1/2” pieces of starboard seems impossible. I don’t’ think epoxy alone will hold, it would also need to be screwed together. Epoxying two plywood 1/2” thick pieces would be easy and wood is easy to work with. We (pronounced Dawn) also have pretty good epoxy skills. We could put a layer of fiberglass on the inside surface to protect it even more from chain hitting it. We could put a Formica surface on the outside to match the existing bulkhead.

Another option is to use 1” thick material and basically mill the hatch out of the solid material. This would probably be the way to go with starboard.

I’ve looked at G10FRP4 panels and I don’t think they’d be easy to work with especially since I have never seen the stuff in person. I’ve also looked at aluminum and stainless steel sheet metal, but they are way more expensive.

No real conclusions yet, but I need to make my mind up quickly. I’m going to send this to the Pearson 424 list and see what they think if any of you have suggestions please do use the comments.


Replacing gate valve with proper seacock

Posted on Mon 22 November 2010 in Projects

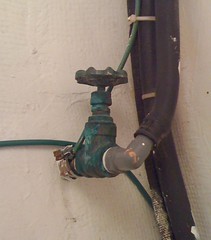
Gate valve

On the left is a shot of the original thru-hull for my shower sump. It has a bronze thru hull with a gate (common household hose bib) type valve. It is situated above the waterline unless you’re on a port tack then it’s well underwater. I don’t think it’s not up to code, but it made me squeamish so I am replacing it with a marelon thru hull and ball valve seacock.

There’s a great video on YouTube from Forespar about how to mount Marelon seacocks which I posted previously. I am basically following those exact steps.

I removed the old hose from the barb, the valve from the thru hull and the thru hull from the boat.

I then prepped the inside of the hull by sanding it down to clean fiberglass with a 4” Ryobi angle grinder.

I prepared a 1/2” marine grade plywood backing plate by cutting the wood and coating it with West Systems epoxy. This will be an upgrade over the original installation which has no backing plate.

Next I dry fit everything to make sure it would all fit together and be able to be tightened adequately. – CHECK!

I removed all of the pieces and cleaned the outside and inside of the hull with Bio-Solv (a more friendly   acetone substitute) being sure to get all of the old silicone (yes, silicone) sealant off the hull.

Assembly based on the Forespar video (You will need a helping hand)

  1. Coat the outer part of thru-hull with 5200 (I used fast cure) all the way up to point to where the nut tightens
  2. Coat the back of the backing block with 5200
  3. Insert the outer part of the thru hull into the boat noting the orientation of the internal grooves to prevent it from spinning
  4. Insert the interior backing block over the thru hull
  5. Place the nut on the thru hull and tighten by hand
  6. Clean up any excess 5200 which squeezes out
  7. Use pliers or a board inserted into the thru hull to prevent it from spinning as you tighten the nut with pliers. Don’t over do this, just tighten it enough so the thru hull is tight and doesn’t spin (but don’t try too hard). We’re looking for just tight enough….
  8. Clean up all the excess 5200 from the hull, the backing plate and the threads of the thru hull
  9. Let this setup and cure (24 hours for Fast Cure)
  10. Put plumbers tape on the thru hull threads and attached the seacock tightening by hand.
  11. Have someone keep the thru hull from spinning again and using pliers tighten the seacock so it is aligned properly as in your dry fit, but it may not line up exactly as you did during the dry fit. DON”T OVERTIGHTEN IT. (See Note below)
  12. Put plumbers tape on the hose fitting, thread it into end of the seacock, attach the hose and clamp in place.

Drink Beer !

We’ll be finishing off the interior soon with the DuraFlex paint we’ve been using everywhere, but it will have to warm up a bit for that to be completed.

NOTE: Really what happens is while you’re putting the seacock on the thru hull you’ll snap the damn thing off and have to run half-way across town and buy another thru hull (luckily only \$12). You’ll then redo the thing as outlined above.


DIY Seacock Installation

Posted on Fri 19 November 2010 in Classes and Workshops

I’m in the middle of replacing a gate valve on my boat with a proper seacock and thought I’d share this video from Forespar. It does an excellent job of showing step by step what you need to do.

NOTE: Link lost due to bit rot.


Windlass Update

Posted on Fri 12 November 2010 in Fiberglass

Board to fill the anchor locker door hole

Saturday morning we’re going back into the yard to have the foredeck fiberglass work completed. I’ve done a lot of the prep work, but I want this structural work to be done by skilled professionals.

When it’s completed the foredeck will be closed off completely, removing the anchor locker door and the only hole will be the hawse pipe for the chain. There will be foot switches and a chain stopper but the only hole that is open all the time will be the hawse pipe.

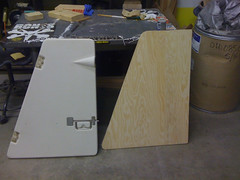
On the left you can see the board I made to be the core for the deck area where the door (also pictured) used to be. This is a 1/2” marine grade plywood which will sit on top of an additional 1/2” of marine grade plywood that is the length and width of almost the entire foredeck. The entire foredeck is going to have an additional 1/2” glassed underneath it and then the area where the windlass will sit will be at least 1” thick of plywood and fiberglass. It should be VERY stout!

With this close to completion we’re already making plans for Thanksgiving and Xmas Cruises! We’ll have some fun things to talk about then (Dawn’s Job) but I’ll still have the technical stuff for all you geeks out there.


Sailrite LSZ-1 Sewing Machine

Posted on Thu 11 November 2010 in Projects

I’m in the market for an LSZ-1 if you’re selling one! I was looking at an older unit on online and contact Matt at Sailrite who sent me this great video about the difference between the version 1 and 2 of their machines. Also, here’s a playlist covering many of the features of the Sailrite LSZ-1. These are very well respected, can’t find anyone who has a bad thing to say about them.

Those videos are under their old YouTube account, you should also check out their new one SailRite1.


Chain Locker and updates

Posted on Sat 25 September 2010 in Projects

image

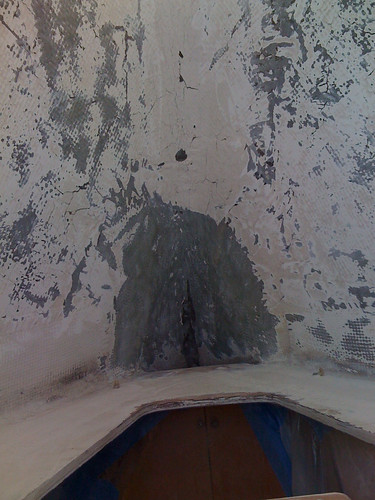
I spent a few hours grinding out the chain locker to remove the old loose gelcoat (maybe it’s paint?) and to get to clean fiberglass where the floor of the locker will be installed. It was a messy job. Most of it done while kneeling in the v-berth and sticking my upper body through the hole you see at the bottom of the picture.

Dawn did some touch up and finish work in the head. We had to cut a notch in the corner of one of the walls so the new portholes could swing open fully. We had our fears about how it might come out, but as usual, Dawn rocked the landing and it’s a 10! More pics on that later.

We ticked a few smaller things off as well, all the halyards are finally installed, the Doel-Fin is installed on the outboard.

Tonight (and every night this week) I’ve been working on those feature comparisons for Liferafts, EPIRBs, Watermakers, etc. I’m also working on the final part list for our NMEA 2000 network.