Mastodon

We're looking for the trash fence...

Hauled Out

Posted on Tue 19 July 2011 in Uncategorized

We’ve been on the hard the past couple of days to do some projects that are safer done ashore than in the water. Mostly we were removing the old transducer and installing a new NMEA 2000 one, but in a new location as well. There are some other above the waterline projects we’re doing as well.

The one thing that is a bit of an issue right now is the anti-fouling paint put on the hull in November 2009 (but not launched until Feb 2010) doesn’t seem to be holding very well. The Pettit Ultima SR60 is flaking off in spots. The yard is talking to Pettit about it and I’ve contacted the P.O. to see if he recalls the kinds of bottom paint which have been used. Everyone is stumped at this point and depending on the actual issue fixing it might be a huge pain (and or expensive). We’re considering just touching it up and dealing with it later as well.

If you’ve had any similar experiences I’d love to hear stories or suggestions.

That issue aside, being in the yard isn’t so bad as we’re rocking out the work!


Stuff For Sale

Posted on Wed 16 February 2011 in Uncategorized

I posted a few Craig's List ads today for some items that have been laying around far too long.

  • Salon table from a Pearson 424
  • 200 feet of rusted chain rode
  • Furuno 1730 RADAR and Display
  • Alpenglow CFL & Red LED Overhead Lights

Feel free to contact me through the blog or Craigslist if you're interested in any of this stuff.


Adding Mapping to the site

Posted on Wed 09 February 2011 in Uncategorized

Ever since I first setup the site for the boat I knew I wanted to tag everything with locations so we could see all the posts as we journey around. A blog for a sailboat pretty much begs for that. One of the main reasons to switch to Wordpress was to have more options for this. I've been trying a few different plugins for geotagging and finally found one called Geo Mashup that seem perfect.

I tagged a location for this post which you can see below, and I added a Map page where you can see all the geotagged posts. Both of these should give you some ideas of the kinds of coolness we'll have on the blog moving forward!


Rocking the list…

Posted on Sat 03 July 2010 in Uncategorized

It’s Day one of a three-day-to-do-athon-weekend. Because of my day job, I couldn’t have the rigger come down last week so we are home on the dock for the 4th this year. That gives us time to rock the to do list.

Saturday’s Accomplishments:

  • Finished the ash battens in the aft berth
  • Finished the ash battens in the v-berth
  • Finished the ash battens in all the little open lockers (3 book shelves) in aft berth and salon
  • Teak trim is back in place in the aft berth
  • Teak trim is back in place in the v-berth
  • Main and Mizzen mast track gates polished, isolated from paint with tape and installed with rivets
  • Mizzen and main winch pads covered with isolation tape to protect the the newly shiny masts
  • Mizzen mast winches (2) installed and lubricated
  • Main mast winches (2) installed and lubricated
  • Mizzen Boom installed
  • Mizzen boom gates and mizzen sheet installed
  • Hole drilled in the v-berth foot locker to accommodate new main mast wiring and all wires pulled forward into the wiring harness area. Nothing hooked up yet though.
  • Spinnaker pole dry fitted to mast track - This isn’t done yet, but I verified the pole will definitely fit on the track and the slides to attach it to the track all work fine on the new t-track. This is a HUGE improvement to the usable deck space; way better than storing it on chocks on the stanchions.
  • Dropped the shop-vac (while it was on) off the dock and into Puget Sound - Luckily it also pretty much unplugged simultaneously. I’ll try it tomorrow after it dries out. Fingers
    crossed

Wow, that’s more than I thought… awesome ! The list probably won’t be as long tomorrow, but hopefully we’ll knock off some big projects. Pics will be taken tomorrow as well.


Seattle Maritime Academy Electrical and Diesel Courses – Last chance today 11 January 2010

Posted on Mon 11 January 2010 in Uncategorized

The Electrical and Diesel classes Dawn and I signed up are starting this week according to the folks at the Seattle Maritime Academy which is part of Seattle Central Community College:

The Electrical course begins tonight (11 January 2010) at 6pm, runs M & W from 6-9 and runs for 8 weeks.  The cost is \$275 + \$25 payable to the instructor. \ The Diesel starts tomorrow:  runs T & TH from 6:30-9:30 for 11 weeks. The cost is \$300.

If you are interested in one or both, you MUST be at the office at 5:30pm tonight to register/pay.

I took the electrical class and both Dawn and I took the Diesel class. The Diesel teacher is a bit of an ass and a grump, but he knows a ton about diesels and we both learned a lot. We had no more knowledge engines than how to change the oil going in and we able to get an engine running and we also did a complete teardown on a dead engine which was great because it completely demystified our engine. I recommend both classes. As far as this being your last chance… if they have seats, I’m sure they will let you in. They need the money! ;-)

Here are the course descriptions:

BASIC ELECTRICITY FOR SMALL BOATS AND RECREATIONAL BOATERS - 7251 CSS 122 1A\ MW 6:00 p.m.-9:00 p.m.\ An electrical class designed for the recreational boater and for the small boat owner. A class that will take the mystery out of how electrical systems work. Topics to be covered will include batteries, alternators, solar and wind generators and related charging systems. Small A/C generator and power inverter systems will be investigated. Methods for determining load requirements, wire sizing and wiring techniques will be discussed. Electrical system troubleshooting, meter reading and hands-on training will be offered to the small boat owner or operation in a six week course. Course requires a minimum of 10 students.

MARINE DIESEL ENGINE MAINTENANCE & OPERATION FOR BOATERS - 7306 CSS 122 3D\ TTh 6-8 pm\ A course in marine diesel engines that includes theory, operation, troubleshooting and repair. The student will learn fundamental operating procedures for marine diesel engines. Instructional format combines classroom lectures with applied training in diesel engine labs. For the small boat owner. Course requires a minimum of 15 students.


Making progress a little bit each day

Posted on Sun 20 December 2009 in Uncategorized

Every project has those days that seem to go on forever where you make baby step type progress but nothing gets to 100% complete. Here’s a bunch of things Dawn and I ticked off the list this weekend:

  1. Removed mizzen chain plates for cleaning and inspection. We now have all of the chain plates pulled
  2. Pulled new bilge hoses but not hooked up yet. I need a few more hose clamps and need to clean the base standsscreens then I can hook it all back up.
  3. Removed the prop shaft coupling from the v-drive so we can send the shaft, coupler, prop out for inspection.
  4. Removed the mizzen mast step for cleaning, inspection and refinishing. The lag bolts that hold the step in place were completely corroded such that there was no useful head to apply a socket. I had to grind the head of the bolt off with the Dremel tool and then pry the step off of the posts which remained.
  5. re-installed the hose for the heater. There was a 4” paper tube that ran from the aft berth to roughly under the starboard companionway where it connected to a T. This tub had become cut and did not seal well so I replaced it with a plastic HVAC tube from Trident that appears much better suited to being on a boat than corrugated paper. When I initially ran it through the bile I didn’t notice that it was probably going to rub on the drive shaft, which would have not been good. It’s now re-routed clear of the shaft.
  6. Cut the fiberglass and have everything laid out to repair the shelf tabbing in the v-berth. When they reinforced the v-berth they had to grind out the epoxy I had used to repair the tabbing so they could get a good clean non-epoxy contact area. I have to go back and put the tabbing again, that should be pretty fast when I decide to do it since I have everything cut and just need to mix up the epoxy and lay it up.
  7. Worked on the cutlass bearing. It was recommended that I cut a notch out of the cutlass bearing which would allow it to be removed without using a press. I’m having some problems getting a clean cut without impacting the strut so I’m  on hold with that right now. I’ll get back to it this week.

Nothing finished, but still that’s a pretty good weekend!


Weekend Update

Posted on Mon 23 November 2009 in Uncategorized

We got a lot done but not as much as we wanted.

Portholes

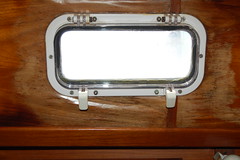
Dawn pulled out the two starboard side 5x12 plastic (cringe) Beckson portholes and cut out a big section of completely dry rotted teak around each porthole. I then resized the openings to fit the new portholes. It was about a 1/4” of material that needed to be removed.  Dawn then made a paper template of the area we needed to repair and cut that out of 1/4” plywood. We then attached that new piece of wood directly to the hull with 3M 5200 and tied into the drip rail with screws. This gives us a base layer on top of which we’ll be installing an additional layer of 1/4” A4 Birch plywood which will then become the painted finished surface. When that is done we’ll install the new gorgeous New Found Metals portholes.

Porthole Water Damage (aka Before)

Demolition of rotted wood

Base Layer Repair

V-Drive

The v-drive work was pretty easy. I pulled the cover drained the water and using a screwdriver pulled away a lot of the corrosion. In the process I broke off a bit of metal around one of the bolt holes and that made me nervous so I’m going to talk to Walter Gear about the V-Drive and see if I should keep going or call it good enough for now and wait for the whole unit to die. They don’t make the RV-20 anymore so replacing it would be a bit complicated but other owners have done it.

V-Drive Corrosion

Windlass and Thru-Hulls

All the bits of the windlass are now removed and the holes are ready to be glassed closed.

I ground off the head of the one thru-hull and was not able to shove it through as the yard suggested so I’m going to let them get it the rest of the way out. I’m also going to have them pull and close the knot meter thru-hull. Airmar is coming out with a new DepthSpeedTemperature instrument that has no log wheel which means no wheel to get gummed up. I’m waiting to hear more about that, but for now we’ll live with the depth transducer as is and then replace it when the new Airmar is available.

Bilge Hoses

I did a bit of grunt work and I by that I mean work involving a lot of grunting as I wriggled around in the bilge and the stern lazerette (which is actually quite roomy) and pulled all of the bilge pump hoses (main, backup and manual) which were original, covered in oil in the bilge and as I found later one of which also had a big cut in it which would definitely have let water in the boat when pumping out and if a following sea came in the hose. The hose clamps on the stern are completely rusted and I will need to cut those off and replace with 316 Stainless Steel clamps. This is part of a general pulling and replace of below the waterline hoses I’m doing since we’re sitting out high and dry. Here’s a shot of me in the bilge.

Patrick in the bilge


Refit Planning and Initial Work Underway

Posted on Mon 12 October 2009 in Uncategorized

<I wrote this last week>

I met with two yards and a third failed to get back to me at all after I sent them my then 4 page (now 7) word doc about my plans. Both yards had essentially the same bill rates and yard rules, I chose to go with the one who got back to me when they said they would and followed my directions more precisely in providing the quote. I’ll divulge the yard and all those details after the work is over and I have a better feel for their work. But the choice has been made and I’m excited to get going.

In meeting with both yards (and when you meet with your yard manager) I think it pays for you to have an opinion about everything and let them try to influence you. For every item in my list, where I had a good idea (wrong or right) about what I wanted done, I could have an intelligent conversation about the plan and they could provide real feedback and cost projections. For every item where I was still very open ended the conversation was really poor. I didn’t really know what I wanted, they don’t know me yet so didn’t really know which way to direct me. Unless I (or you) are willing to just let them do the work how they want with little input I think it behooves you to have your own plan and ask them to review and correct or modify the plan based on their experience. Be organized is the mantra. I have the word doc I mentioned and a spreadsheet of a 160+ items listing all the major parts I’ll need. Another thing that has been helpful is to be open minded, put in the wish list have a decent ideas of your priorities and then let the costs drive the cuts. Also think about what you have to do now (like while the boat is out of the water or while the rig is down) and what can wait or be added later on your own dime at the slip.So, given all of that I think you see a bit more about how I go about things.

In today’s meeting with the yard we discussed the windlass installation a bit more and they are recommending not doing a big fiberglass project, but instead using a 1/2” stainless steel plate to mount the windlass to the deck. He penciled up a drawing of the plate being bolted through the deck joint, but I’m not sure now as I write this how that would work on my bow where the deck joint is the toe rail. That big stainless plate might look great though and I’m sure there’s a way to mount it securely. The real next step on that project is to get the windlass here, set it on the deck and figure it out. We’ve decided to go with a Lofrans Tigres windlass based on the good SSCA reviews, but it’s not ordered yet. The yard is going to dig up some pics of similar installs for me to review.

In addition to making a little progress on the windlass the big thing I've done today is work on the parts spreadsheet. I’ve been going through an finalizing items so I have a make and model for every item that needs one and I'm looking for prices online. I’m comparing Fisheries Supply, West Marine and Defender. Fisheries doesn’t carry Maretron so that is limiting their usefulness quite a bit and their prics are coming out roughly the same as West Marine; Defender’s prices are coming out cheaper almost across the board. There are some tricks to use at Fisheries I’ve not tried yet, but it might not be worth it if they carry very few of the items I want.

On the boat I pulled down all the sails, running rigging and the booms. The booms are in the workshop and I’m removing all the hardware from them in preparation for them to be refinished. I was using a lot of hand power tools, but last night I bought a Ryobi 12” Drill Press and it has been awesome. It’s way more powerful and doesn’t tire me out as fast as using a hand drill. For all the screws that aren’t coming out after an overnight soak in PB Blaster (99% of them) I use the drill press to remove the head of the screw. Once that is off I pry the piece of hadware off the mast and then use a pair of vie grips to unscrew the screw from the mast. This works 95% of the time. The the other 5% the screw snaps off flush with the mast. For those I need to go back and drill out the screws.