Mastodon

We're looking for the trash fence...

Manning Up In Alaska by Dick Drechsler

Posted on Mon 01 November 2010 in Review

Manning Up In Alaska by Dick Drechsler

This is a great book for cruisers who want to see all the little things you will have to deal with while out sailing. No matter that Dick’s pockets are deeper than a lot of cruisers; you’re still going to have to deal with the same equipment failures and navigational challenges. This is one of those books you can read a few pages at a time (good for reading in the head) as opposed to a must read, but it’s a solid book for cruisers to get a feel for the life of cruising.


Cruising Information Groups

Posted on Wed 27 October 2010 in Amateur Radio

Just wanted to take a second to give a shout out to a bunch of mailing lists I’m on as I think they useful to anyone looking to go cruising some day.

Puget Sound Cruising Club: The PSCC holds monthly local meetings (if North Seattle Community College is local to you) with topical speakers and on the water meetups. I find the list is a good source of local knowledge and referrals. Most of the members in PSCC have no long-term cruising plans beyond the Puget Sound, but they love to hear about your plans. When Dawn and I did last go to one of their Friday meetings we felt like a bit of a novelty, being under 40, but we were very warmly received. I’d probably find time for the meetings if they weren’t on Friday nights, but the list is a great resource even without the meetings.

These next set groups are area specific and the membership seems to be people actually cruising or planning to leave shortly. Conversations tend to focus around best cruising guides, entrance requirements changes, and referrals for mechanics, haul outs, marinas and anchorages along the route. I am sure there are groups for other regions but as I am not yet interested in those areas I’m not on those lists.

There are also several lists oriented towards different technologies you might find of interest;

  • Airmail2000 This list will walk you through setting Airmail using an internet connection so you can at least rule out the SW not working when you go to use it on your SSB Rig
  • NavMonPC NavMonPC is a PC based instrument display that works by displaying the data on your NMEA network. I am experimenting with this on Deep Playa. The guy who writes it is very nice and fixes bugs as you point them out, but it has a ways to go still in terms of usability, modernity of UI and reliability.
  • WINMOR A software based PACTOR hardware modem equivalent. I have a PACTOR so I don’t really follow this group too closely. If you don’t have a PACTOR you should at least give this a try.
  • 12VDC_Power Most members are doing off the grid installations,but they know a lot about 12V DC, solar panels, wind generators, etc.
  • Honda_EU2000_Generators All hail the mighty Honda EU2000, enough said. Winking
    smile

How do you handle all of that email?

  1. I use an email address that I don’t plan to use all that often once we go cruising. That way random people won’t have my email address I plan to use on my SSB.
  2. DIGEST MODE !!! You can edit your subscription to any Yahoo! Group so it sends you a daily summary email of the posts on the group. For these groups you’ll get one email per group instead of 5 to 10 (or more).
  3. Stay on Topic – These lists are about getting things done, not social networks (well maybe PSCC is, but it has low email volume) so keep your replies and questions relevant.

Lot of information to glean and by all means don’t just ask for help, try to offer some answers as well these lists only work if people who have information share it.


From The Scout Report: The Mariners' Museum

Posted on Fri 15 October 2010 in Web Stuff

I feel like the Scout Report includes this type of stuff just for me, thanks!

The Mariners' Museum http://www.marinersmuseum.org/

Started in 1930 by Archer Milton Huntington, The Mariners' Museum has grown over the past eight decades to include a host of exhibits on the seafaring life, including the recently added Monitor Center. Visitors who are new to the Museum's site may wish to take the virtual tour on the homepage to get a sense of their collections. Moving on from that, visitors should also click on the "Exhibitions" area. The best part of this section are the "Stationary Voyages", which take a look at boats as objects of art, interpreted through contemporary photographs. Visitors are also encouraged to add their own photographs to this particular collection. Also, the "Collections Online" area allows users to search over 30,000 items online. The website also includes ample visitor information for those who find themselves in the Hampton Roads area, and there's also an email form that allows interested parties to ask curators question about the museum

>From The Scout Report, Copyright Internet Scout 1994-2010. http://scout.wisc.edu


DIY Wi-Fi System

Posted on Thu 14 October 2010 in Gear

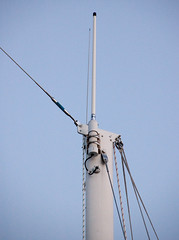
I was reading this post on Panbo about the RogueWave Wi-Fi system which is the same as the Ubiquiti Bullet M2-HP I am using at a much inflated price. Granted I don’t’ have anyone to call for tech support, but for this, it isn’t something I need tech support. Here’s a picture of my setup which I have mounted on my mizzen masthead.

dsc_8897

The components

  • Ubiquiti Bullet M2-HP\ This is the Wi-Fi Bridge. It connects the network on my boat to external Wi-Fi networks. If you were comparing this to your home system, it serves basically the same purpose as the cable or DSL modem (but different).
  • Linksys E3000 Access Point\ This is the network the PCs and iPhones and other such toys on the boat connect to. I picked this one because it had a USB port on it which allows me to have a large USB drive plugged into it and to have all ship’s documents, manuals, PDF catalogs, magazines, etc available to all the computers I let on my network. I can also grab that little USB Drive if I need to ditch the boat and have all my documents with me in electric format as well and hard copies in my ditch bag.
  • 12Volt POE outlet – I don’t have a product link for this. I had one from another device and reused it. POE – Power Over Ethernet is standard that allows power (heh!) and data to travel on the same Ethernet cable. This little device has an AC  to DC converter wall wart that connect to it. One Ethernet port to connect to the Bullet and another to the Linksys Internet port.
  • 50’ Direct Burial Ethernet cable Direct Burial cable is filled with gel so water won’t get into it and wick down inside. This is the Ethernet cable I ran up my mast and connected the POE outlet to the Bullet.
  • Digital Antenna 825-WLW Wi-Fi Antenna I was buying a Digital Antenna VHF and AIS antenna so I went with their Wi-Fi antenna as well.
  • Blue Sea CableClam + P-Clip Together these hold the Ethernet cable securely as it exits the mast, prevent it from chafing on the hole in the mast and prevents water from getting into the mast as well.

In order to protect the radio and secure it to the masthead I made a PVC sleeve that the radio is inside and the the antenna attaches to. I then made a teak bracket to hold the sleeve to the mast because I couldn’t think of anything better and was running out of time. Here’s the basics on that.

  • Protective Sleeve for the Radio\ I didn’t want to leave the Bullet exposed to the harsh UV and rain, so I made a PCV Tube that the protects the Bullet. Here’s how that works:
  • Let’s pretend the Bullet is 5” long
  • I have a 7” x 2” PVC tube (approximately)
  • The Top has a PVC Fitting that has a 1” threaded hole. This end is sealed with silicone and two screws to hold it securely but also to allow it to be taken apart if needed.
  • The Digital Antenna 825-WLW threads into the 1” hole on the top of the sleeve.
  • The Bullet threads directly onto the bottom of the Antenna
  • The bottom of the PVC tubs has an cap with a hole drilled in it to allow the POE wire to exit and is glued onto the bottom of the sleeve with PVC primer and cement, just like when we made the conduit for the mast.
  • Custom Mount for the Sleeve DSC00366 I could not figure out how to mount the PVC pipe to my mast, so I made a bracket out of teak that is essentially a rectangle but with a half-circle routed out of one side, kind of like a U-Chanel. I bolted the teak to the mast and then used hose clamps to hold the PVC sleeve in the U channel. This was a tad tricky as I had to drill some holes through the teak for the hose clamps to pass through. click this pic to se a close-up of that bracket.  I admit it’s not my best work, but its functional and it’s 40’ in the air so I’m never going to see it anyway. :-)

That’s all of the pieces and how they go together. Let me know if you need me to write up any more about the wiring or the actual network setup. One thing I will not is that the POE and Linksys are currently running on AC, I plan to convert them to run directly of the DC power in the future.


Chain Locker and updates

Posted on Sat 25 September 2010 in Projects

image

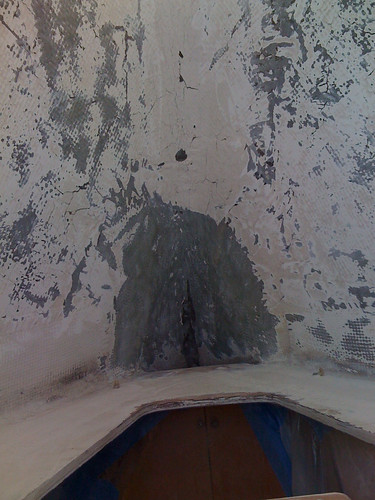
I spent a few hours grinding out the chain locker to remove the old loose gelcoat (maybe it’s paint?) and to get to clean fiberglass where the floor of the locker will be installed. It was a messy job. Most of it done while kneeling in the v-berth and sticking my upper body through the hole you see at the bottom of the picture.

Dawn did some touch up and finish work in the head. We had to cut a notch in the corner of one of the walls so the new portholes could swing open fully. We had our fears about how it might come out, but as usual, Dawn rocked the landing and it’s a 10! More pics on that later.

We ticked a few smaller things off as well, all the halyards are finally installed, the Doel-Fin is installed on the outboard.

Tonight (and every night this week) I’ve been working on those feature comparisons for Liferafts, EPIRBs, Watermakers, etc. I’m also working on the final part list for our NMEA 2000 network.


Windvane Comparison

Posted on Fri 24 September 2010 in Systems - Rigging

Here’s a brief comparison of different windvanes I did including prices


Windlass Project is ramping up

Posted on Fri 24 September 2010 in Fiberglass

Preparing to make a huge mess

DSC_8889

This week I got a quote on the work to create a proper chain locker. That estimate was higher than I thought it was going to be so I’ve started to do some of the prep and demolition work myself.

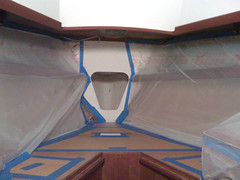
Pictured on the left you can see that I’ve bagged off the beautiful ash battens that Dawn installed and closed off the storage under the v-berth as well.

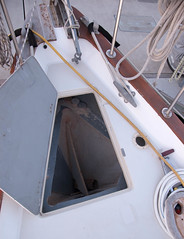
On the right (if this works), I started doing some demolition. I cut out the floor of the anchor locker and now it’s open to the lower area and will create what I’m calling a chain locker.

When this is all done, the deck will be cut open and a new solid deck without a door is what you see. It will be ship shape and water tight, just like we like it!


Liferaft Comparison

Posted on Fri 17 September 2010 in Review

I’m starting to do some long-term research on liferafts and part one of that process for me is to survey what’s out there and what the features are. My basic criteria to even make it into my list are:

  • 4 Person
  • Offshore
  • Valise packed

My checkmark of features is pretty loosey goosey just going by what I see in the marketing brochures which sometimes don’t make it 100% clear what’s extra and what’s in “plus” versions of that raft. My general feeling is all the liferafts have the basics covered. The decision points to me look like:

  • Usability – Do they actually work well. Need to look at Practical Sailor for that
  • Survival Goodies. Do I want them to be supplied by the manufacturer or do I want to pack in some minimal items and also have a ditch bag.
  • Servicing – What is the required service interval? (3 years seems the norm) and where do they have service centers?
  • Double Floors and Walls – Do I plan on being in this thing in the cold for days?
  • Price – At some point the price just ends up going beyond our budget.

No thoughts yes as to what I‘m going to buy, but here’s the raw spreadsheet.

There is also the possibility of looking into used and factory refurbished models. I’ve not looked into that all yet.


Making a windlass plan of attack – Step one: Pontificate

Posted on Wed 18 August 2010 in Projects

I have and plan on reusing the Lofrans Progress that came with my boat. The motor is the same large one that comes with the Tigres.

You may remember that my windlass was originally mounted so far aft that the hawse pipe went through the v-berth and into the decommissioned water tank; basically rendering it impossible for use to sleep there comfortably. This winter I removed it had the the deck closed up and am now making my plans to place the windlass further forward on the deck and to run the chain through the shallow anchor locker and into the unused chain locker below.

Seems as though I have one of four choices:

  1. Place the windlass forward of the locker and use a PVC hawse pipe to run the chain aft to achieve adequate fall. Meridian has this kind of setup as does Syringa.
  2. Place the windlass motor and mount just aft of the locker and use a PVC pipe to run the chain foreward and through the locker. Parallax has this setup with a similar if not the same windlass.
  3. Build a stand for the windlass in the anchor locker at the highest point of the chain fall and modify the door to go around the windlass. There are some horizontals which have been done that way.
  4. Install the windlass on the door itself (or a beefed up hatch without hinges) and essentially leave the locker closed except for maintenance purposes. Another derivation of this is to bolt down a more permanent opening, possibly thicker and have it closed with a more bolt down fittings like they use on aircraft.

1 and 2 seem like the least work, but I’m worried about how well the chain will run. I don’t want to be having to deal with kinked up chain in the anchor locker all the time. Also number 1 doesn’t really seem possible on our boat because we don’t have a bow sprit for our anchor and our anchor comes all the way back to the deck. I also plan to put a padeye on the deck just aft of the anchors for the solent stay so again number 1 seems like a no-go. If I can alleviate my concerns about the flow of chain then number 2 is probably the best idea.

number 3 sounds a lot of work and I’m not sure how to make the door water tight once I cut into it. I also am not sure that the drive shaft of the windlass would be long enough to reach through the entire pad.

I think number 4 would be a big upgrade. It would also close off the deck better than the door does today. It would however remove a storage spot from the foredeck, which is handy for wet  things like hoses and our folding anchors.

SO number 2 and number 4 seem like the most viable options at this point with number 2 probably winning out based on the simplicity. If you have any thoughts please do chime in.


And We Made It to the San Juans!

Posted on Mon 10 August 2009 in Crabbing

Written by Dawn again…

After we finally left the grip of the mainland (Port Townsend) we made our way across the Straits of Juan de Fuca early on a foggy morning.  Once we made our way into the Straits there wasn’t much of an eventful crossing (thank goodness) with the exception of getting a hail over the radio from s/v Hello World! They were crossing the Straits on their way to Port Townsend back from their circumnavigation of Vancouver Island, BC!  It was great to hear their voices again and to catch up briefly on their way to meet up with our other cruising friends, Kim and Fisher, who were about to head out on their voyage to the S. Pacific!  We crossed the Straits making good time to intercept with our other friends who made it up to Westcott Bay on San Juan Island.  As we rounded San Juan Island, we ran smack dab in the middle of a super pod of Orca Whales feeding off of the coast!  It was way cool!  But we were very respectful of the feeding whales and so we headed outside of their feeding ground and went around them.  We hailed our friends over the VHF and they escorted us through the channel into Westcott Bay.  We rafted up and settled in for a wonderful evening of story telling about our “incident” and listened to some other great tales.  That evening “someone” (ok it was Patrick) thought it would be a great idea to drop the crab pots (even after having a little too much drink).  I was awakened by the sound of giddy boys squawking about the size of the crabs they brought back to the boat.  They were busy killing and cleaning the huge Dungeness and Red Rock crabs that were already caught in the crab traps after dropping them for only an hour!  YAY!  (And a little side note, apparently, Patrick is very afraid of crabs!  It was very funny watching his reaction)  Our first crab of the season and so plentiful!  We were set for a few days with plenty of yummy fresh sweet crab meat.  That evening I cooked up some homemade crab pasta sauce and shared it with our friends.  How amazing was that???

I awoke early the next morning while others were still asleep and decided to go for a row in our dinghy.  If we do this trip again, I will have definitely make more of an effort to acquire some kayaks.  Although rowing the dinghy is nice, I would have much preferred paddling in a kayak.  I rowed around the bay visiting and watching the seals, tons of seals, and tons of water fowl and other birds.  I even saw a tree with five bald eagles hiding in the bows of the branches.  All I could make out were their prominent white feathered heads poking out here and there.  It was sooooo amazingly beautiful, relaxing and quiet.  The fact that we ran aground quickly melted away and became a distant memory! After spending the day and another relaxing evening in Westcott Bay the raftup decided it was time to head north towards Sucia Island!