Mastodon

We're looking for the trash fence...

New Year, Same boat projects

Posted on Sat 02 January 2010 in Projects

Ticked a few things off the to do list the past few days.

New Years Eve day, Dawn worked on the masts and booms filling all the holes we don't need anymore with Belzona 1111. Thanks to at for helping us get started. Dawn is really good at these kinds of projects that require being neat and detailed oriented. I'm better at breaking things an making a mess.

The bilge hoses have all been replaced. This took a little longer than planned because I used stiffer hose which added some unforeseen complexity. It also became delayed due to an apparent shortage of 316 SS hose clamps in the size I needed. Fisheries Supply in Seattle is horrible at managing their stock, but their prices are better than West Marine. Included in this a Perko bronze strainer for the manual bilg pump and an inline check-valv on the stern end of the secondaylarge bilge pump. I am considering walling off the aft-most section of the bilge to minimize the area which stays wet. We would place the primary pump in that section but if we had more water than that then it flow over the wall and we would kick on the secondary pump. We also need to put a float switch on the primary bilge pump, currently it is only enabled by the breaker switch.

The Walter Machine RV-20 V-Drive has a raw water cooling chamber on the top of it which is prone to corrosion. Eventually it can corrode through allowing sea water to mix with the oil in the bottom half of the v-drive where all the gears are. This would be bad. Several owners have cleaned up the corrosion and used Marine-Tex to protect the area before hooking everything back up. Some owners (including my surveyor who also owns a Pearson 424) have removed the raw water cooling altogether. The corrosion in my unit is so bad that it damaged one of the bolt holes used to attach the top plate to the v-drive so I am going the route of leaving the unit dry. So now instead the raw cooling water going from the strainer to the v-drive and then to the egine it now goes directly from the strainer to the engine. I will install a temperature gauge on the v-drive to monitor it for overheating and I left the hoses in place so I could hook it up back if it ever did overheat. Eventually we will probably replace the v-drive, but that is not something we wanted to do right now.

I have not finished this yet, but the anchor washdown pump was not protected by a strainer. I purchased all the hoses, clamps and the Sherwood strainer. This will get installed completed tomorrow. I would have finished it today, but I forgot to buy the mounting bracket.

I also capped off the vent thru-hull that used to be part of the holding bag system. I will also being putting a plug on the inside portion of the deck fiting for pumping out. I thought about removing and glassing these closed, but I don't this it's neccesary, capping them of is adequate redundance. I also put a plug in the thru-hull I eventually plan to use for the water maker. It has a ball valve, but I like the added security of the plug as well. This is something we'll do just before we plan to leave.

All in all it was nice to tick a few thing off the list, but we still have a ways to go!


Next set of things in the refit

Posted on Thu 19 November 2009 in Projects

The boat has been moved form sitting in the yard where the bottom was prepped and painted, some keel damaged was repaired (oopsy), the v-berth was prepped by me, and the windlass was removed. The boat is now sitting inside the prep tent. I’ve not been to it yet, but I’ll go tomorrow and take a bunch of pictures.

from gave me a call about some blisters he saw along the waterline. We’re not sure if it’s just a paint issue or if there is some gelcoat damage. We’ll know more when they start to prep for painting. This is one of those “known unknowns” which could be nothing or could be expensive. We’ll find out soon enough.

The yard is prepping the boat for repainting the stripes, and I aguess polishing the hull as well as a bunch of fiberglass projects including closing up some thru-hulls, reinforcing the v-berth and moving the windlass. I also have a lot of chores to do:

  • Grind off a thru-hull so it can be pushed in and then glassed closed.
  • Remove the teak trim from the deck where the windlass was removed.
  • Cleanup the water jacket in the VDrive and sand off the corrosion on the input shaft.
  • I have a lot of measuring to do to determine the wire lengths needed for the new electronics and mast lights. I’ll start with just the lengths needed for the masts plus some extra so I can put in terminal blocks or connectors which will allow the masts to be pulled without cutting any wires.
  • I also want to work on replacing the hoses below the waterline. I’ll pull the hoses, measure them and pickup new hose from Fisheries or West Marine.
  • Dawn is probably going to star on the portholes or at least getting all of the pieces in place to make it happen.

Very busy weekend!!


Plumbing Upgrade and Starter complete

Posted on Sun 07 June 2009 in Pearson 424

Raw Water Strainer

This weekend I finished installing the starter. Along the way I decided to replace the bonding wire on the starter to the v-drive with tinned wire because the existing wire was corroded. As I was doing this, I also decided to replace the bonding wire from the v-drive to the raw water strainer because it had broken a few months back. Removing the nut on the raw water strainer lead to the strainer breaking.  The strainer (bronze) was bolted to an aluminum bracket with stainless steel screws and it had started to bend at the hanger points. I was planning to replace this fall when I haul out, but turns out I needed to do it today. I put a board on that aluminum bracket and put in a new raw water strainer. All in all it was pretty simple, the new fittings lined up a bit differently, but the new strainer looks great and will provide years of reliable service! I have one more bonding wire to put in, just need a 8 AWG to number 10 screw ring terminal to check that one off the list.

DSC_4505

I also finished installing the starter this weekend after I painted it and let it dry. It pretty much popped right in, I fastened in all the bolts to the block, put the new bonding wires on and then hooked up the battery cables and starter switch. She started up on the first try and water ran well through the exhaust. Everything is look good!

Shower mixer and nozzle mount

Finally, I finished our plumbing upgrade as well by putting in a new shower mixer valve and handheld wall mount sprayer. The original faucet was a 4” on center individual knobs for hot and cold and had a fitting for the shower nozzle right on the faucet. When I pulled this off the wall I was left with two holes in the whole. I put a Shurflo mixer volume control in the bottom hole and a wall mount for the shower nozzle in the top hole. This completes a project I started last summer!


Toilet Installed

Posted on Wed 10 December 2008 in Interior

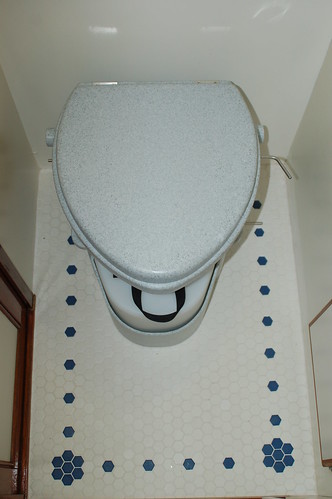
Here's the new composting toilet bolted down to the new tile floor. Looking very spiffy !!

DSC_2235


Plumbing - Check it Off

Posted on Sat 06 December 2008 in Projects

image

As I told my neighbor at the Marina, “We can check something off the list… and add 12 more things to it!” The plumbing project is now complete!!

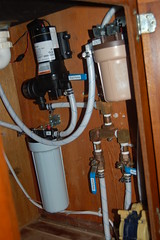
We started this project because were unhappy with the quality of the water which had a but of a smell to it, the look of the faucets and the LOUDNESS of the water pressure pump. We resolved all those issues, especially the pump. The old pump was so loud I was embarrassed to even used the water, the new pump is so quiet I wasn’t even sure it was working at first. I also did away with the splices connecting both the water pressure pump seen in the picture and the wash down pump in the v-berth and put in a power bar instead which will let me add things in the future.

There are some random pics on TwitPic too.

Here’s all the new pieces that went into the project:

  • All plumbing hose replaced with Trident 1/2” white hose. The old hose was clear which had allowed growth within
  • Jabsco Sensor Max VSD 31750 Variable speed water pump
  • Added American Plumber water filter to the to the pressurized side of the system. Foot pump had filter previously.
  • Galley faucet with sprayer
  • Head faucet
  • Blue Sea Systems 30 Amp Power Bar
  • Removed faucet from v-berth
  • Removed sink drain to thru hull connection in v-berth. This thru hull is still used for the anchor wash down pump. I need to add a strainer here as there is not one today.

Tomorrow we should finish up with the tile in the head and bolt down the Nature’s Head composting toilet. I’m also going to determine where the Nicro vent will be installed as well. More posts and pics on that later.


Head and Holding Bag Removed

Posted on Sun 13 July 2008 in sv Deep Playa

This weekend Dawn and I proved Deep Playa still goes by driving her over to the pump out to empty the holding bag and rinse out the whole toilet system so we could remove it completely as part of installing our Nature's Head composting toilet. Our neighbor Dan was heckling us as we drove out of the causeway since he's never seen us take the boat out. We need to replace the jib halyard before we can really sail her again, but was good to motor her around the marina. We got a little docking practice in as well proving to ourselves that we need a lot more practice. :-

Toilet

The goal for this weekend was to remove the toilet, the holding bag and as much of the plumbing as we could without covering ourselves and the bilge in poop! As I said we first went over to the pump out and emptied the holding bag. We ran about 20 gallons of fresh water though the system and pumped that out. We also used the bilge pump-out and were able to get the water in the sewer down to less than inch. We'll need to get down there and really clean it good in the next few months.

So after our docking adventures pulled back into our own slip and got to work ripping things apart. My strategy was to pull close to through hulls, pull the toilet and then start removing the bag and hosing in sections. The toilet was head down on a small wood base which was on the larger platform. Disconnecting the toilet from the hoses wasn't too hard but I had to cut the waste pipe with a hack saw. After that the whole thing lifted right out.

Next, I disconnected the hoses to the holding bag. Some of these hoses had plugs handy and some I closed off with plastic bag duct taped in place around the opening. With that done the empty holding bag was removed.

Finally we removed as much of the hoses as we could leaving only those which were directly connected to the through hulls. While the through hulls are closed I'm not sure of the best way to cap the ends. I have a guy coming out to do some fiberglass work and he'll cap those through hulls and remove the remaining hoses.

Toilet Platform Removed

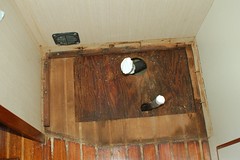
With all the "messy stuff" removed I attacked the 2" high platform the toilet sat on. The wood underneath this was wet and I'm not sure if its rotted. It seems pretty solid but I'm not sure. I left the heated in the head and it dried out a lot in less than hour I hope it will dry out completely over night and the wood will prove to still be solid.

Bilge without Holding Bag

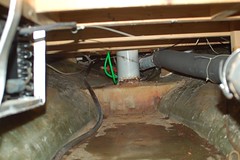
Here's a shot of the bilge area without the holding bag, that is  a LOT of storagesystem area we are regaining.

A great weekend of getting things done! This next week the fiberglass tabbing should be repaired and then we can start putting Deep Playa back together on the inside and start taking her out.