Mastodon

We're looking for the trash fence...

Suggestions on Winlink Position Reports

Posted on Sat 14 January 2012 in Amateur Radio

This is for all you Maritime Mobiles who are probably not really active in HAM Radio, but are using Winlink for email and position reports. Here are few operating suggestions:

Sending Position Reports

image

  • When you send a position report, ALWAYS but your vessel name in beginning of the comment fields. No one probably knows what your callsign is, but we can look around and see your boat name.
  • While underway, send at least one position report. I usually do this once a day on long passages or at roughly the midway on shorter passages. Its fun to later connect all the dots!
  • Always send a position report when you reach your destination indicating you are anchored or moored safely

Check Who’s around you

Did you know you can ask Winlink for a list of other people who are nearby? It goes without saying that you need to have updated your position recently for this to work. But assuming you have done that send a mail to INQURY with the subject REQUEST and the message body WL2K_NEARBY. Send that off and next time you check your mail you will have a list of nearby folks. Notice I didn’t say vessels. Winlink is for any HAM to use, so you will see RVers, Backpackers as well. Here’s a sample. If you always put your vessel name in your position report comments this is lot nicer to read!

List of users nearby W7PEA
Postion: 21-09.69N  105-13.60W  posted at: 1/11/2012 6:16:00 AM
(NOTE: All dates in UTC, distance in nautical miles and bearings true
great circle.)
Winlink 2000 Nearby Mobile Users
(Only the latest report for each call within the past 10 days is listed.
CALL     Dist(nm @ DegT)        POSITION             REPORTED           COMMENT
W7PEA          0.0 @ 000   21-09.69N 105-13.60W  2012/01/11 06:16  Deep
Playa - Anchored at Chacala
KJ6LNI        26.1 @ 198   20-44.83N 105-22.13W  2012/01/08 15:15  Anchored
in La Cruz
KJ6NYJ        26.5 @ 197   20-44.40N 105-22.00W  2012/01/10 23:08
VE0NAV        55.0 @ 319   21-50.88N 105-52.72W  2012/01/13 00:59
Arrived Isla Isabella much warmer here than Mazatlan All Good
KQ6MY         55.0 @ 319   21-50.88N 105-52.76W  2012/01/13 22:36
Isla Isabella
KJ6NKS       113.8 @ 169   19-18.03N 104-50.19W  2012/01/09 01:04  Here in
Tenacatita with all of our local friends
KD7NPI       113.8 @ 169   19-18.02N 104-50.15W  2012/01/09 00:39

Let People Know Who you Are

One of the best things you can do is to put your vessel name in your position reports. The next thing you can do is update your entry on the HAM Lookup servers, login to www.QRZ.com and www.HAMQTH.com and at least update your description with your vessel name and a link to your web page. This way if someone looks up your callsign because they saw it on Winlink they can know your vessel name and send you an email via Winlink or contact you on VHF. Pretty handy!


Actisense NGW-1-ISO Firmware Upgraded fixes incorrect Position passed to Icom M504

Posted on Thu 08 December 2011 in Nav Station

I have been noticing a problem with the position displayed in my Icom M504 VHF. My current latitude is 24°09.200N. But the VHF was displaying 2°49.200. The GPS data is fed to my VHF and my SCS PTC-IIUSB modem from the NMEA 2000 network via the Actisense NGW-1-ISO (NMEA 200 to NMEA 0183) gateway.

I contacted Actisense support and they suggested I upgrade the firmware in my NGW-1-ISO. That involved a multi-day hunt for serial cables here in La Paz. In the end, I found them at Sterens which is on Forjadores across the street from the Plaza de La Paz (AKA the Soriana shopping center) with help from the gang at Club Cruceros de La Paz. BTW, Sterens is an electronics store with all kinds of cables, connectors, and electronics doo-dads. More like a Radio Shack than a Frye’s, but better than the Radio Shack’s here and cheaper too! I paid \$89 MXN for 2 6ft serial cables.

Once I had the serial cable in hand, I cut one end off the end I wouldn’t be connecting to the computer. I then used the continuity test on my multimeter to label all the wires so I knew which wire went to which pin on the DB9 connector I would be plugging into my computer. You need to label each wire to its proper DB9 RS232 cable pinout because later you’re going to need to connect Pin X with the Red wire on the NGW-1-ISO, etc. This is not hard at all. Your digital multimeter has a continuity test. You stick one of the probes into Pin 1 and test each wire, when it beeps you label that wire as #1 and so on.

With all the wires labeled, I was ready to connect the NGW-1-ISO’s wires to the Serial Cable as specified in the NGW-1-ISO manual for connection to a PC. Once that was done, I ran Actisenses’s upgrade utility, selected the COM port the serial cable was connected to and performed the upgrade. I offer all that detail in case one of you needs to do it too. There currently is no other way to upgrade the non-USB Actisense gateways.

After all that, I connect everything back up to my ICOM M504 and the position is now being displayed correctly. This is VERY important in case we ever need to use the DSC Distress call on our VHF which transmits an alert and our position. Without this fix the position would have been wrong!

Crisis averted. The world is now safe for eating delicious homemade cupcakes which Dawn made last night. Its good here. Its very good here!


iPhone Personal Hotspot is AWESOME !

Posted on Mon 05 December 2011 in Gear

Dawn has been providing some travel log entries so I though it was time to give you some more geek info!

When we were a few months out from leaving Seattle I broke the screen on my aging iPhone 3G. I was tempted to get an Android phone because they are cheaper, but I loved all my iPhone apps. So, I broke down and decided to get the then newly released unlocked iPhone 4. Coughing up the small fortune for the unlocked iPhone 4 allows me to use the phone with any carrier in the world.

The other day, I finally had some free time to take my iPhone 4 to the local TelCel support center here in La Paz and bought a new sim card (\$150 MXN) and signed up for a month to month 3Gb data plan (\$500 MXN). They were having computer problems and it took HOURS to get my sim card setup so they even gave me 6GB for the first month and said I’d probably get 6GB again next month too!

You can refill your account at any OXXO store (like 7-11) or TelCel store or franchisee. By the way, everyone here in La Paz says you do not want to buy 3G modems or Sim cards from the franchisees or other stores.

Now that I have the data plan, I can tether the iPhone 4 to my laptops, ship’s computer, iPad, etc via WiFi, Bluetooth or with a USB cable and use the cell phone to access the internet from any device! Apple calls this iPhone Personal Hotspot. It works great and I still have an iPhone I can carry around and look at maps, etc while we are roaming around the town!!

I’d highly recommend using a phone that supports tethering. You could use other phones which are cheaper than the iPhone, I’m not sure which ones though. Getting the 3G USB modem is also great but it doesn’t give you the freedom of using a handheld mobile device in your pocket.


Our First Weather Fax

Posted on Fri 10 June 2011 in Systems - Communications

I’ve started devoted a little bit of time each night to playing around with our ICOM M710 SSB Radio. We’re sitting in the middle of a marina surrounded by aluminum masts so I assume reception or transmission is going to be greatly impaired. Thus far I’m focusing on what I can hear and then I’ll work up to transmitting.

With that in mind, two night ago I was tuning around to find some Shortwave broadcasts and was able to hear China and Cuba, not too shabby. Last night I use the GetFax module in Airmail to receive (or download you might say) our first weatherfax. Weatherfax will be critical to our onboard weather forecasts and route planning so it felt pretty good to see it work properly on the first try!

Here’s our first weatherfax image.

Our First WeatherFax

I’ll do a video podcast at some point of the image actually downloading its cool to watch, and it will be impressive to all my geek  friends to see just how SLOW it is. There’s no broadband at sea (well that we can afford).


DIY Wi-Fi System

Posted on Thu 14 October 2010 in Gear

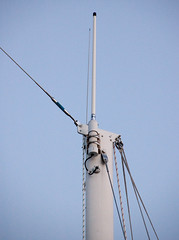
I was reading this post on Panbo about the RogueWave Wi-Fi system which is the same as the Ubiquiti Bullet M2-HP I am using at a much inflated price. Granted I don’t’ have anyone to call for tech support, but for this, it isn’t something I need tech support. Here’s a picture of my setup which I have mounted on my mizzen masthead.

dsc_8897

The components

  • Ubiquiti Bullet M2-HP\ This is the Wi-Fi Bridge. It connects the network on my boat to external Wi-Fi networks. If you were comparing this to your home system, it serves basically the same purpose as the cable or DSL modem (but different).
  • Linksys E3000 Access Point\ This is the network the PCs and iPhones and other such toys on the boat connect to. I picked this one because it had a USB port on it which allows me to have a large USB drive plugged into it and to have all ship’s documents, manuals, PDF catalogs, magazines, etc available to all the computers I let on my network. I can also grab that little USB Drive if I need to ditch the boat and have all my documents with me in electric format as well and hard copies in my ditch bag.
  • 12Volt POE outlet – I don’t have a product link for this. I had one from another device and reused it. POE – Power Over Ethernet is standard that allows power (heh!) and data to travel on the same Ethernet cable. This little device has an AC  to DC converter wall wart that connect to it. One Ethernet port to connect to the Bullet and another to the Linksys Internet port.
  • 50’ Direct Burial Ethernet cable Direct Burial cable is filled with gel so water won’t get into it and wick down inside. This is the Ethernet cable I ran up my mast and connected the POE outlet to the Bullet.
  • Digital Antenna 825-WLW Wi-Fi Antenna I was buying a Digital Antenna VHF and AIS antenna so I went with their Wi-Fi antenna as well.
  • Blue Sea CableClam + P-Clip Together these hold the Ethernet cable securely as it exits the mast, prevent it from chafing on the hole in the mast and prevents water from getting into the mast as well.

In order to protect the radio and secure it to the masthead I made a PVC sleeve that the radio is inside and the the antenna attaches to. I then made a teak bracket to hold the sleeve to the mast because I couldn’t think of anything better and was running out of time. Here’s the basics on that.

  • Protective Sleeve for the Radio\ I didn’t want to leave the Bullet exposed to the harsh UV and rain, so I made a PCV Tube that the protects the Bullet. Here’s how that works:
  • Let’s pretend the Bullet is 5” long
  • I have a 7” x 2” PVC tube (approximately)
  • The Top has a PVC Fitting that has a 1” threaded hole. This end is sealed with silicone and two screws to hold it securely but also to allow it to be taken apart if needed.
  • The Digital Antenna 825-WLW threads into the 1” hole on the top of the sleeve.
  • The Bullet threads directly onto the bottom of the Antenna
  • The bottom of the PVC tubs has an cap with a hole drilled in it to allow the POE wire to exit and is glued onto the bottom of the sleeve with PVC primer and cement, just like when we made the conduit for the mast.
  • Custom Mount for the Sleeve DSC00366 I could not figure out how to mount the PVC pipe to my mast, so I made a bracket out of teak that is essentially a rectangle but with a half-circle routed out of one side, kind of like a U-Chanel. I bolted the teak to the mast and then used hose clamps to hold the PVC sleeve in the U channel. This was a tad tricky as I had to drill some holes through the teak for the hose clamps to pass through. click this pic to se a close-up of that bracket.  I admit it’s not my best work, but its functional and it’s 40’ in the air so I’m never going to see it anyway. :-)

That’s all of the pieces and how they go together. Let me know if you need me to write up any more about the wiring or the actual network setup. One thing I will not is that the POE and Linksys are currently running on AC, I plan to convert them to run directly of the DC power in the future.