New Outboard Bracket
Posted on Sun 02 August 2009
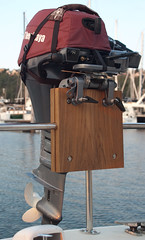
This is a project I’ve been slowly working on, but needed to be completed before out big trip to the San Juans. Out boat came with a fiberglass and starboard outboard bracket that was fine for smaller motors but not our four stroke Yamaha F8.
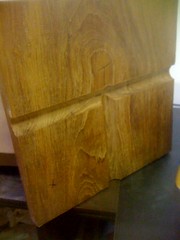
I was able to buy teak that was roughly the right width that I wanted it was a little wider, but I didn’t care enough to deal with cutting it down.
The next part after that was to use a 1” half-circle router bit to cut away the “T” that fits over the railing and the stantion. This also required a router that had a 1/2” shank. I was going to borrow a friends router but his was only 1/4”. If you are thinking of buying a router, don’t save \$20 on the 1/4” shank… you’ll be sorry, or in this case I’ll be sorry.
I routed out a 1/2” T on each side. I removed about an 1/8” at each pass and it made a HUGE mess, so plan ahead for that. It’s not shown in this photo but I also removed the material in the shoulders of the “T” to make more room in that area.
After that work done in the shop, I brought the router and the wood down to the boat to do the final fit. I probably ended up removing another 1/8” in all directions, by that I mean I made the T wider and deeper. This was mainly needed because this area in my stern rail has a bit of a curve in it.
In the shop I used guides for all my router passes. On the boat I did it free hand and it made the boards loose their perfect alignment. I could take it off, bolt it together and run it through a planer if I had one, maybe I’ll ask one of the woodworkers down at the shop, maybe I’ll work on one of the 9,0000 other projects. ;-)
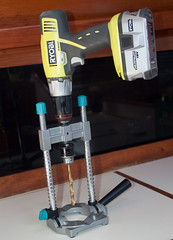
Once the dry fit was complete I used a forstner bit to make the recessed holes for my stainless steel hardware. I used 5/6”- 1-3/4” bolt and just eyeballed it. In order to ensure things would line up , I drill the bolt holes with the wood clamed to the stern rail. I used a hand drill drill-press adapter to ensure I was drilling straight. I also used this to control the depth of my forstner bit.
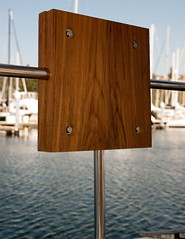
In order to lift the outboard from the dinghy to the new bracket we use the new mizzen sheet I installed. This worked like magic and now I don’t need to buy a separate set of lifting tackle, which saves about \$150 !!