Mastodon

We're looking for the trash fence...

Window liner

Posted on Mon 30 July 2012 in LandYacht

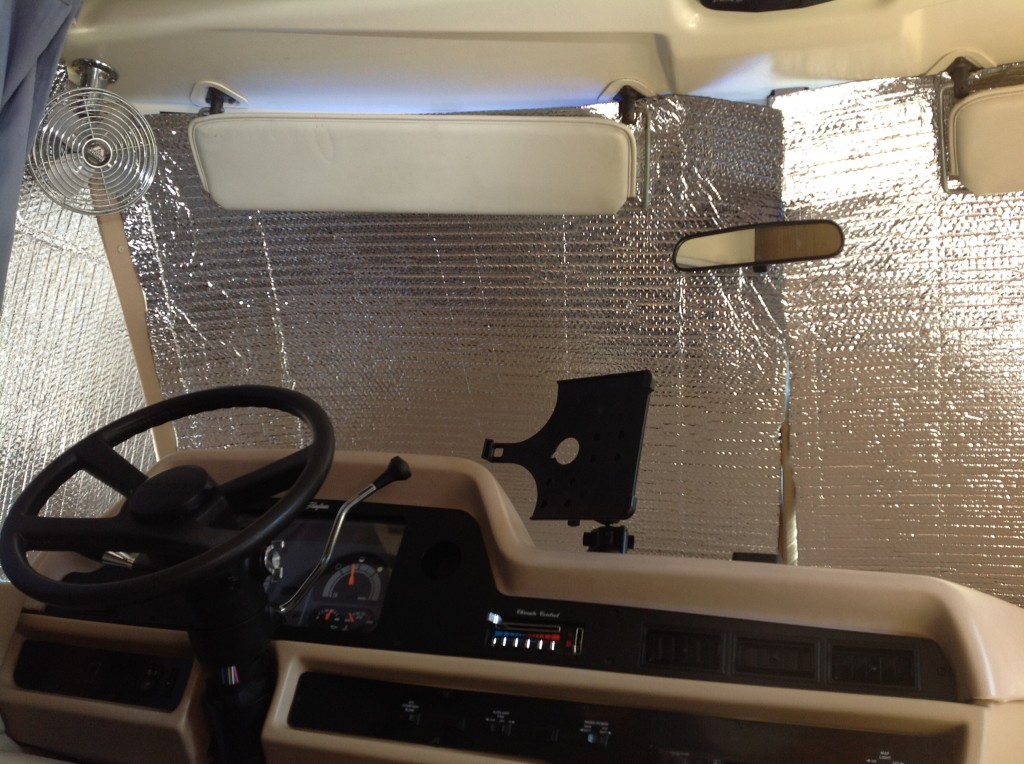
Reflectix is cheap and awesome. We used it on the boat and its works great. Here we've not only made the front windows darker than just the curtain, but also added some heat shielding. Yay for cheap!

LandYacht Reflectix

Available at Home Depot's in the US, but unfortunately not in Mexico!


Our first KOA Campground

Posted on Fri 27 July 2012 in Campground

LandYacht KOA Kent, WA

LandYacht KOA Kent, WA


First Stop Kent, Washington

Posted on Fri 27 July 2012 in Destinations

We finally made it out of Seattle!! We were recovering all morning from last nights bon voyage party and ran more errands this afternoon, including another stop at Matty's house to use the shower and drop off a few things.

Thanks to everyone who cam down to Golden Gardens for the send off, it was a great spot and Dawn and I were happy to see everyone! We can't wait to see you all soon, maybe on the road, maybe in Mexico, or some other exotic location! We miss you all already!

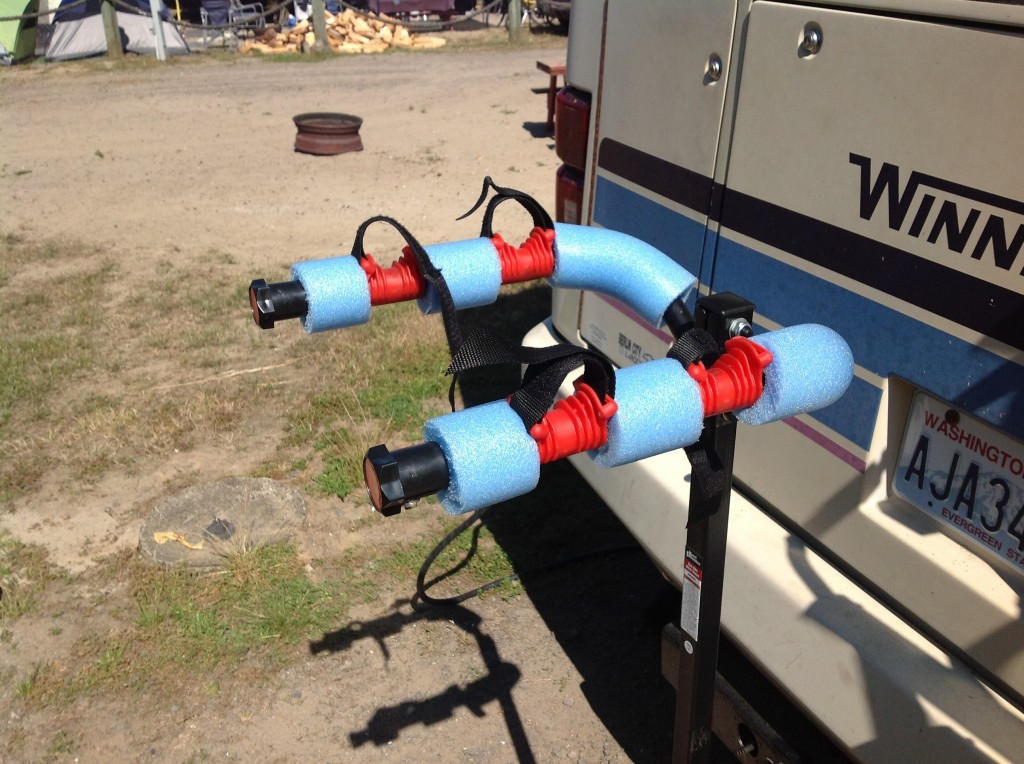
After running errands including get a bike rack and some more tools from Harbor Freight it was almost 8pm so we decided to head to the Seattle\Tacoma KOA Campground 12 miles away in Kent. We just got back from taking a walk through the place, and while the setup is very compact, there are a lot of amenities, including a heated pool, showers, large chess and checker boards, dog park. Its pretty nice. The place is packed too.

Of course no blog entry from me would be complete without a project or two. Two days we used the shower for the first time and immediately after we noticed water dripping out from under the coach. After a little online research and digging around under the shower floor, i figured out the shower pan sags enough with an adult in it that the p-trap bears all the weight. This lead to the p-trap becoming cracked and thus the leaks. We bought a new p-trap and I installed it shortly after we arrived here in Kent. When it dries out under there, I'll cut two pieces of 3/4" plywood to add additional bracing.

It feels good to finally be on the road. Road Trip 2012 is underway!!


Finding a Land Yacht

Posted on Sun 15 July 2012 in LandYacht

The Requirements

When Dawn and I decided we wanted to do the RV thing for 4 to 5 months, we started thinking about the amenities. We love our boat; it’s very functional with our lifestyle. Dawn goes to bed early and I usually stay up pretty late. In order to make this work we knew we’d need a dedicated bed, separate from the living area of the motorhome so she could sleep and I could read, work on projects, research, play with the HAM Radios, etc. In addition to that we also really wanted a separate shower stall. We don’t have a wet bath on the boat and we prefer this. Given the right motorhome this probably would not have been a deal breaker, but it was a definite preference. That was it for living requirements really. As for the rig itself, we wanted something pretty easy to drive and small enough to get into older parks, so we ruled out anything over 30 feet and we were looking primary around the mid 20 foot range.

We also have a passion for all things vintage, and minimalist. We also believe strongly in community. For us this meant we really wanted a funky vintage RV. We also wanted one with a strong owners group, selfishly for our own help, but also so we could return the favor over the long haul and help others.

The Search

Searching for the RV happened exclusively via Craig's List using http://SearchTempest.com. On Craig’s List you can only search one city at a time. Search Tempest let’s you define your search across as many Craig’s List cities as you want. We started searching Oregon and Washington, but as time went on we realized we didn’t need search the entire NW, and Puget Sound was good enough, which still requires Search Tempest to do the search easily.

We spent about a week visiting 1970’s eras Winnebagos. We LOVE these. The boxy style is gorgeous, and some of the layouts of the \~25 foot Braves and Chieftains are really awesome. This was our initial target and we saw some great rigs, but ultimately they all required more work to be ready to do a big trip then we were willing to do. Along the way we also had some great stories.

We called one owner who we knew had a late 70’s brave with the entire interior disassembled and needed to be reinstalled. We talked to him on the phone and he went over this again. We asked him, if the exterior was tight, waterproof, no rot, etc. He said, “Totally.” We went to see it and there was a 1 foot by 6 inch hole in the roof where a vent should have been and rain was pouring into the RV. A lot of people love their RVs and can’t see the warts I guess. ;-)

The Find

After about a week of looking we felt the clock ticking. We gave up on the vintage Winnebagos and expanded our search to ot­her years and body types within our price range. This led us to finding a 1991 25 foot Winnebago Chieftain on a Chevy 6.2L Diesel chassis. We’re attracted to the diesel because we work on them all the time on the boat. The layout is great with an aft double bunk, dedicated shower, and convertible dinette table. This rig lacked the vintage styling we wanted but it has the benefits of having more modern systems and a very roomy layout for its paltry 25 foot length.

Right now she’s at the mechanic and we’re expecting that to finish up any day now. I’ll explain all that in a future post.


Deep Playa Land Yacht Division

Posted on Mon 09 July 2012 in Road Trip

Hey all, if you want to know more about the motorhome, the great US roadtrip of 2012 or any of that kind of stuff, I setup a separate blog for that.

https://deepplaya.com/LandYacht

All of the posts will some day get posted to the Deep Playa Facebook page and sent out as tweets @DeepPlaya.

UPDATE 2022: We don't do the Face or the Tweet any longer.

So for now, this will be last of the Land Yacht talk on this blog.


Land Yacht

Posted on Sat 07 July 2012 in Road Trip

When we left La Cruz de Huanacaxtle and headed to Seattle, our plan was simple: Get a cheap RV and tour America by land. Route TBD. We had hoped we could find something vintage and cool looking which we might want to keep and then renovate in the future, but the quality of those rigs was so poor and we didn’t want to do a renovation up-front. That lead us to expand our search to the ”less-cool”, but more modern rigs. In the end we found a 1991 Winnebago Chieftain 25RC with a diesel engine. We were drawn to the diesel since we are more familiar with the care of a diesel from owning sv Deep Playa. The layout has a dedicated bunk, stand-up shower and a dedicated dinette and sitting area. These match with the way we live on the boat and that works pretty well.

Right now the RV is getting some brake works, tune-up, fluids changed, etc. We’ll hopefully be able to pick her up on Monday, give a deep cleaning and start moving in.

More adventures to come !!

DSC03829


Decommissioning the Boat

Posted on Mon 18 June 2012 in Maintenance

In order to leave the boat for an extended period of time you higher someone to clean bottom and to watch after the boat (check dock lines, batteries, dehumidifier, etc) and you have to do a bunch of prep here’s a list of the things we’re doing to prep our boat:

  • Go through all storage areas and look what can be removed from the boat
  • Empty, Defrost and clean Refrigerator
  • Clean shower sump
  • Wipe down the interior with Vinegar
  • Remove and clean Bimini
  • Remove all perishable food stores
  • Fill the water tanks and add Vinegar
  • Leave zincs and wrench out for bottom cleaner
  • Change engine oil, oil filter, primary fuel filter and Racor fuel filter
  • Equalize batteries and add water
  • Rinse surfboards and bags
  • Giveaway gasoline
  • Remove and clean all halyards and jib sheets
  • Prep Generator for storage by draining fuel and spraying Fogging Oil into Spark plug, pull starter several times
  • Mount and lock outboard on the stern
  • Pickle the watermaker
  • Change outboard Oil, flush engine, fog engine
  • Have diver clean bottom put on new zincs and bag prop
  • Put extra cleats on t-track
  • Fill Diesel Tank and empty Diesel Jerry Cans
  • Remove jib leads form t-track, clean and store
  • Set Xantrex battery charger to HOT setting
  • Repair mast boot tape
  • Docklines and Fenders arranged for both sides
  • Engine Coolant Topped Up
  • Remove and clean sails and sail covers
  • Wash, polish and wax topsides and cockpit
  • Rinse bilge with fresh water
  • Repair, clean and re-install Dodger
  • Close all thru hulls
  • Setup Dehumidifier to drain into the bilge
  • Setup AC powered fan in salon
  • Put AC Fan and Dehumidifer on their own extension cord direct to the dock
  • Setup DC fans throughout boat

Busy busy busy… coming in a week earlier than we originally planned made this bearable because we could take days off when we were too hot and tired. There were other projects we worked on too, but they weren’t necessarily required, I’ll save those for later.


Getting your FM3 in Bucerias

Posted on Sun 10 June 2012 in Uncategorized

[NOTE: This post is current in June 2012].  Currently there is a Mexican tourist visa law, which has not been implemented yet, but will change the process outlined below.

Your FMM is the 6 Month Mexican Tourist Visa granted when you clear-into Mexico (or fly in). It's good for six months and it not supposed to be renewed. However, some cruisers I know go to the airport, ask for a new visa and they are provided with one. Apparently, it depends on the person at the service counter. When we tried to do the same we were turned down and informed that it was not possible to so any longer and we would have to apply for a FM3 (non-residential visa).

We took the following steps to get our FM3 visas.

Location Location Location When I was asking around about the location of the INM Office none of the cruisers or the bus drivers seemed to know anything about it, so I will give you detailed directions to the immigration office in Bucerias, Nayarit, Mexico.  The INM office closes at 2:00PM sharp!  Leave yourself plenty of time. From the bus, get off the at Camarones Hotel (this is the landmark the drivers know).  It has a big arch spanning across the street.  There is an OXXO on the opposite corner. The cross streets are Highway 200 and Las Palmas. Once you get off the bus, walk down the hill towards the bay and the INM office is on the right hand side, there is a nice big sign and guards with machine guns to keep the Canadians under control. ;-P

Here is what you are going to do:

  1. Acquire an permanent street address
  2. Fill out the printed and online forms.
  3. Print out three months of bank statements
  4. Get your passport photos
  5. Go to the INM, drop off paperwork and pay the paperwork fee at the Bank and receive receipts of payment.
  6. Go to the INM to verify everything is ready, pay for FM3 at Bank and pickup FM3

That's the summary I wish someone told me, for us, we went to the INM first to see how it all works, they explained the steps to us, then I came back with our paperwork and I had left off our middle names so we had to do it again. Then when it was all complete, we had to make an extra trip because while the person who signed Dawn's paper work was in that day; the person who signed mine was not.

I had to come back. Not a big deal, we're cruising we got all the time in the world! Let's go through the detailed process without our mistakes.

Step 1 - Get an Address You need a local address which is in the vicinity of your INM office. The easiest way to do this is to stay in the Marina La Cruz. If you're paying customer they seem very happy to write you a letter saying you live there. We had stayed there a few days here and there and we had planned to leave the boat there over the summer. If you're not a customer of the marina, I don't think they will do this for you.  They will print off a letter stating your address and signed by an attorney.

Step 2 - Fill out the Printed and On-line Forms There are printed forms you need to fill out which has information they use for statistical purposes, but it is required. Club Cruceros in La Paz has good instructions on this here: http://www.clubcruceros.net/index.php/guides/documentation-and-visas/mexican-visa-applications.html They have an English version of the form as well. You CAN NOT turn in the English form. It is merely a guide.

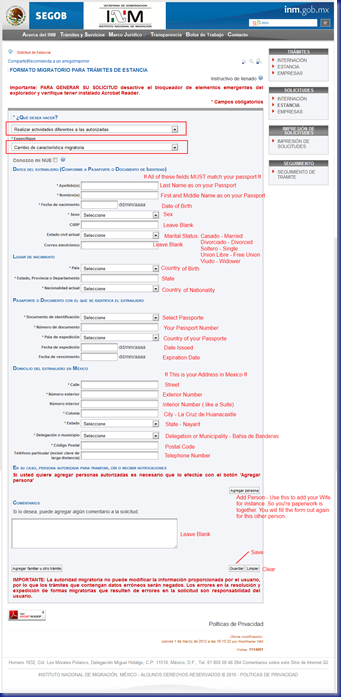
There is an on-line form you fill out which is what I'll call the official FM3 Application. In theory, you can track the status of your application from the website, This did not work for us and wound up going to the office after 3-4 weeks to check the status and they were completed. Here is a link to the form: http://www.inm.gob.mx/index.php/page/Solicitud_de_Estancia This image translates the fields for you.
INM_Form

Step 3 - Print your Bank Statements You need to show you have \$1500.00 USD in the bank for the past three months per person (\$3000 total for 2). You can use paper statements or you can print out your statements from your bank and use those. If you are submitting the same bank account for a husband and wife BOTH your names need to be on the statement. If one of you doesn't have an account with enough money in it then there is more work to do. I don't know what it is. Contact an agent to help you (see bottom). I also don't know anything about Mexico's views on gay marriage, but I guess they just want to see the right names and the right amount of money.

Step 4 - Get your Passport Photos Get all of your paperwork together and go to the INM office in Bucerias. If there is not a person with a sign for passport photos standing outside the INM, walk back up the hill and about half-way up the street you will see a sign for FM3 Photos. We paid \$300.00 MXN for our photos. This takes about 30 minutes.

Step 5 - Goto the INM to drop off your paperwork and pay the processing fee When you go to the INM, a nice man with a large automatic weapon will ask you to sign-in (your ID # is your passport #) and will give you a number. You can wait inside if there are chairs or outside, or if you are number 73 and they are 10 you can go get lunch. I would bring a book and I would be prepared to spend 2-3 hours here waiting.  I would recommend not going on Mondays.

When your number is called they will check that everything is filled out OK, you have all the right papers, etc.. Then they will hand you a form to take to the bank to pay the processing fee. This fee is just for paperwork. Its not the FM3 fee. They will also tell you to bring back 2 copies of the receipt along with the original. The Bank will not print these for you. You need to get a copy.

There is a bank on the corner of La Palmas and Highway 200 (at top of the hill) to the right, next to the OXXO. You can get copies at the Internet Cafes across the street on the same corner. Copies are like \$1 Peso!

-- WAIT -- We were told to come back in 2 weeks. We waited three. Then we went back only Dawn's was ready. This is their country, be patient and don't be a jerk!

Step 6 - Go to INM to Pickup FM3 and Pay FM3 Fee When you go to INM you do the same sign-in get a number thing. Assuming everything is ready they will send you off to the bank to pay the FM3 Visa Fee. You will again need 2 copies of this as well as the original. They will have you sign your FM3, supply both thumbprints. You'll sit back down while they laminate your FM3. When they are done they will hand you a shiny new laminated FM3 !

If you are not up for that, in every town there are agents who will fill out the paperwork and stand in the line for you. The fee for this service is around \$1000 Pesos. Ask around on the VHF Nets if you want an agent.


Thinking of Dive Hookahs

Posted on Fri 08 June 2012 in Projects

I want to build a 12VDC Hookah which will support two divers while cleaning the bottom of our boat (6 feet). We don’t have room to store one of the floating motorized version, but we have plenty of room to mount one inside the boat.

Here are the basic features \ design elements I’m looking to include.

  • 2 Divers for shallow dives less than <30 Feet. 90% of the time < 6eet while we clean the boat bottom
  • 12VDC Compressor with switch to cycle on\off to fill reservoir tank
  • Reservoir tank to allow air from compressor to cool, and to keep compressor from running continuously
  • 40 Micron particle filter
  • 4-5 CFM @ 45PSI minimum 100-150PSI maximum

If you have built something or have comments on the specs, let me know!


Cleaning the Hull

Posted on Thu 24 May 2012 in Uncategorized

It is a never ending battle to keep the boat bottom clean. In fact, I think it’s impossible, but we try. You get three kinds of growth. The sea cabbage grows all over the bottom. Its is leafy it is easy to remove by running a wide blade putty knife along the hull. There is a slimy but that seems to prefer the sunny side of the hull along the water line. It only comes off with a fairly aggressive (black) 3M \ Scotchbrite pad. And lastly there are the barnacles. They grow very sparsely along the hull and cluster on anything which is metal and thus not bottom painted, as well as LOVE the overhanging stern section which is always bouncing in and out of the water. On the hull they pop off with the putty knife. On the waterline and metals bits you really have to hack at them to get them off which uses considerable oxygen\energy.

We had been able to keep up with the waterline and the bottom fairly well by snorkeling. The stern is always a bit of a mess though, and the brand new paint on the waterline stripe is now scratched up badly.

The metal bits (deeper in the water) are just too hard to do via snorkel. I can’t hold my breath long enough and without a weight belt, you spend most of your time trying to keep from floating against the boat. Today we borrowed a dive hookah and weight belt from another boat, and man was it awesome. I spent about a half hour in the water and was able to hack all of the barnacles off the prop, shaft and gudgeon. Maybe that 1.5kts of boat speed we were missing will come back!

We use Petite’s Barnacle ban on our metal bits (prop, shaft, gudgeon). It seems to ban nothing, but when I did scrape them clean the grey paint was still there where it didn’t get scrapped off, so I think its doing ok.

Our boat sits perfectly on its waterline in calm water at the dock. But there is RARELY calm water at anchor. This is why people raise their waterlines. Not because they’ve overloaded the boat, but because at anchor your boat is always bouncing around and at all times 4-6 inches of your waterline are bouncing in and out the water. Filter feeders like Barnacles LOVE this! When we redo the bottom paint this next year I am going to look into raising the water line and I’m going to paint the stern overhang completely in bottom paint.

Zincs at Shilshole Bay Marina were replaced every six months. We haven’t been in Marinas much at all since November and the zincs are about 1/2 gone at 9 months. We’ll have the divers replace them when they clean the boat while we’re gone.

After today’s experience I can really see the benefit of a dive hookah. You could even use it for snorkeling in general. Unfortunately, retail dive hookahs cost \$2000 to \$5000 depending on the make and model. Not something that is in my budget right now, but it is possible to build your own for less than \$500 and I think I’m going to start looking into that.